Poultry

CUT UP YOUR OWN CHICKEN AND SAVE MONEY

DSC_0378
DSC_0378

We all like to save money and almost all of us like chicken.  An easy way to enjoy both is to buy a whole chicken at your favorite grocer and ask their butcher to cut it up.  We all know -- that won't happen.  So we'll take it home and cut it up.  It really isn't that difficult so don't be intimidated.

Let's get started.  Get your sharpest knife and a clean cutting board.

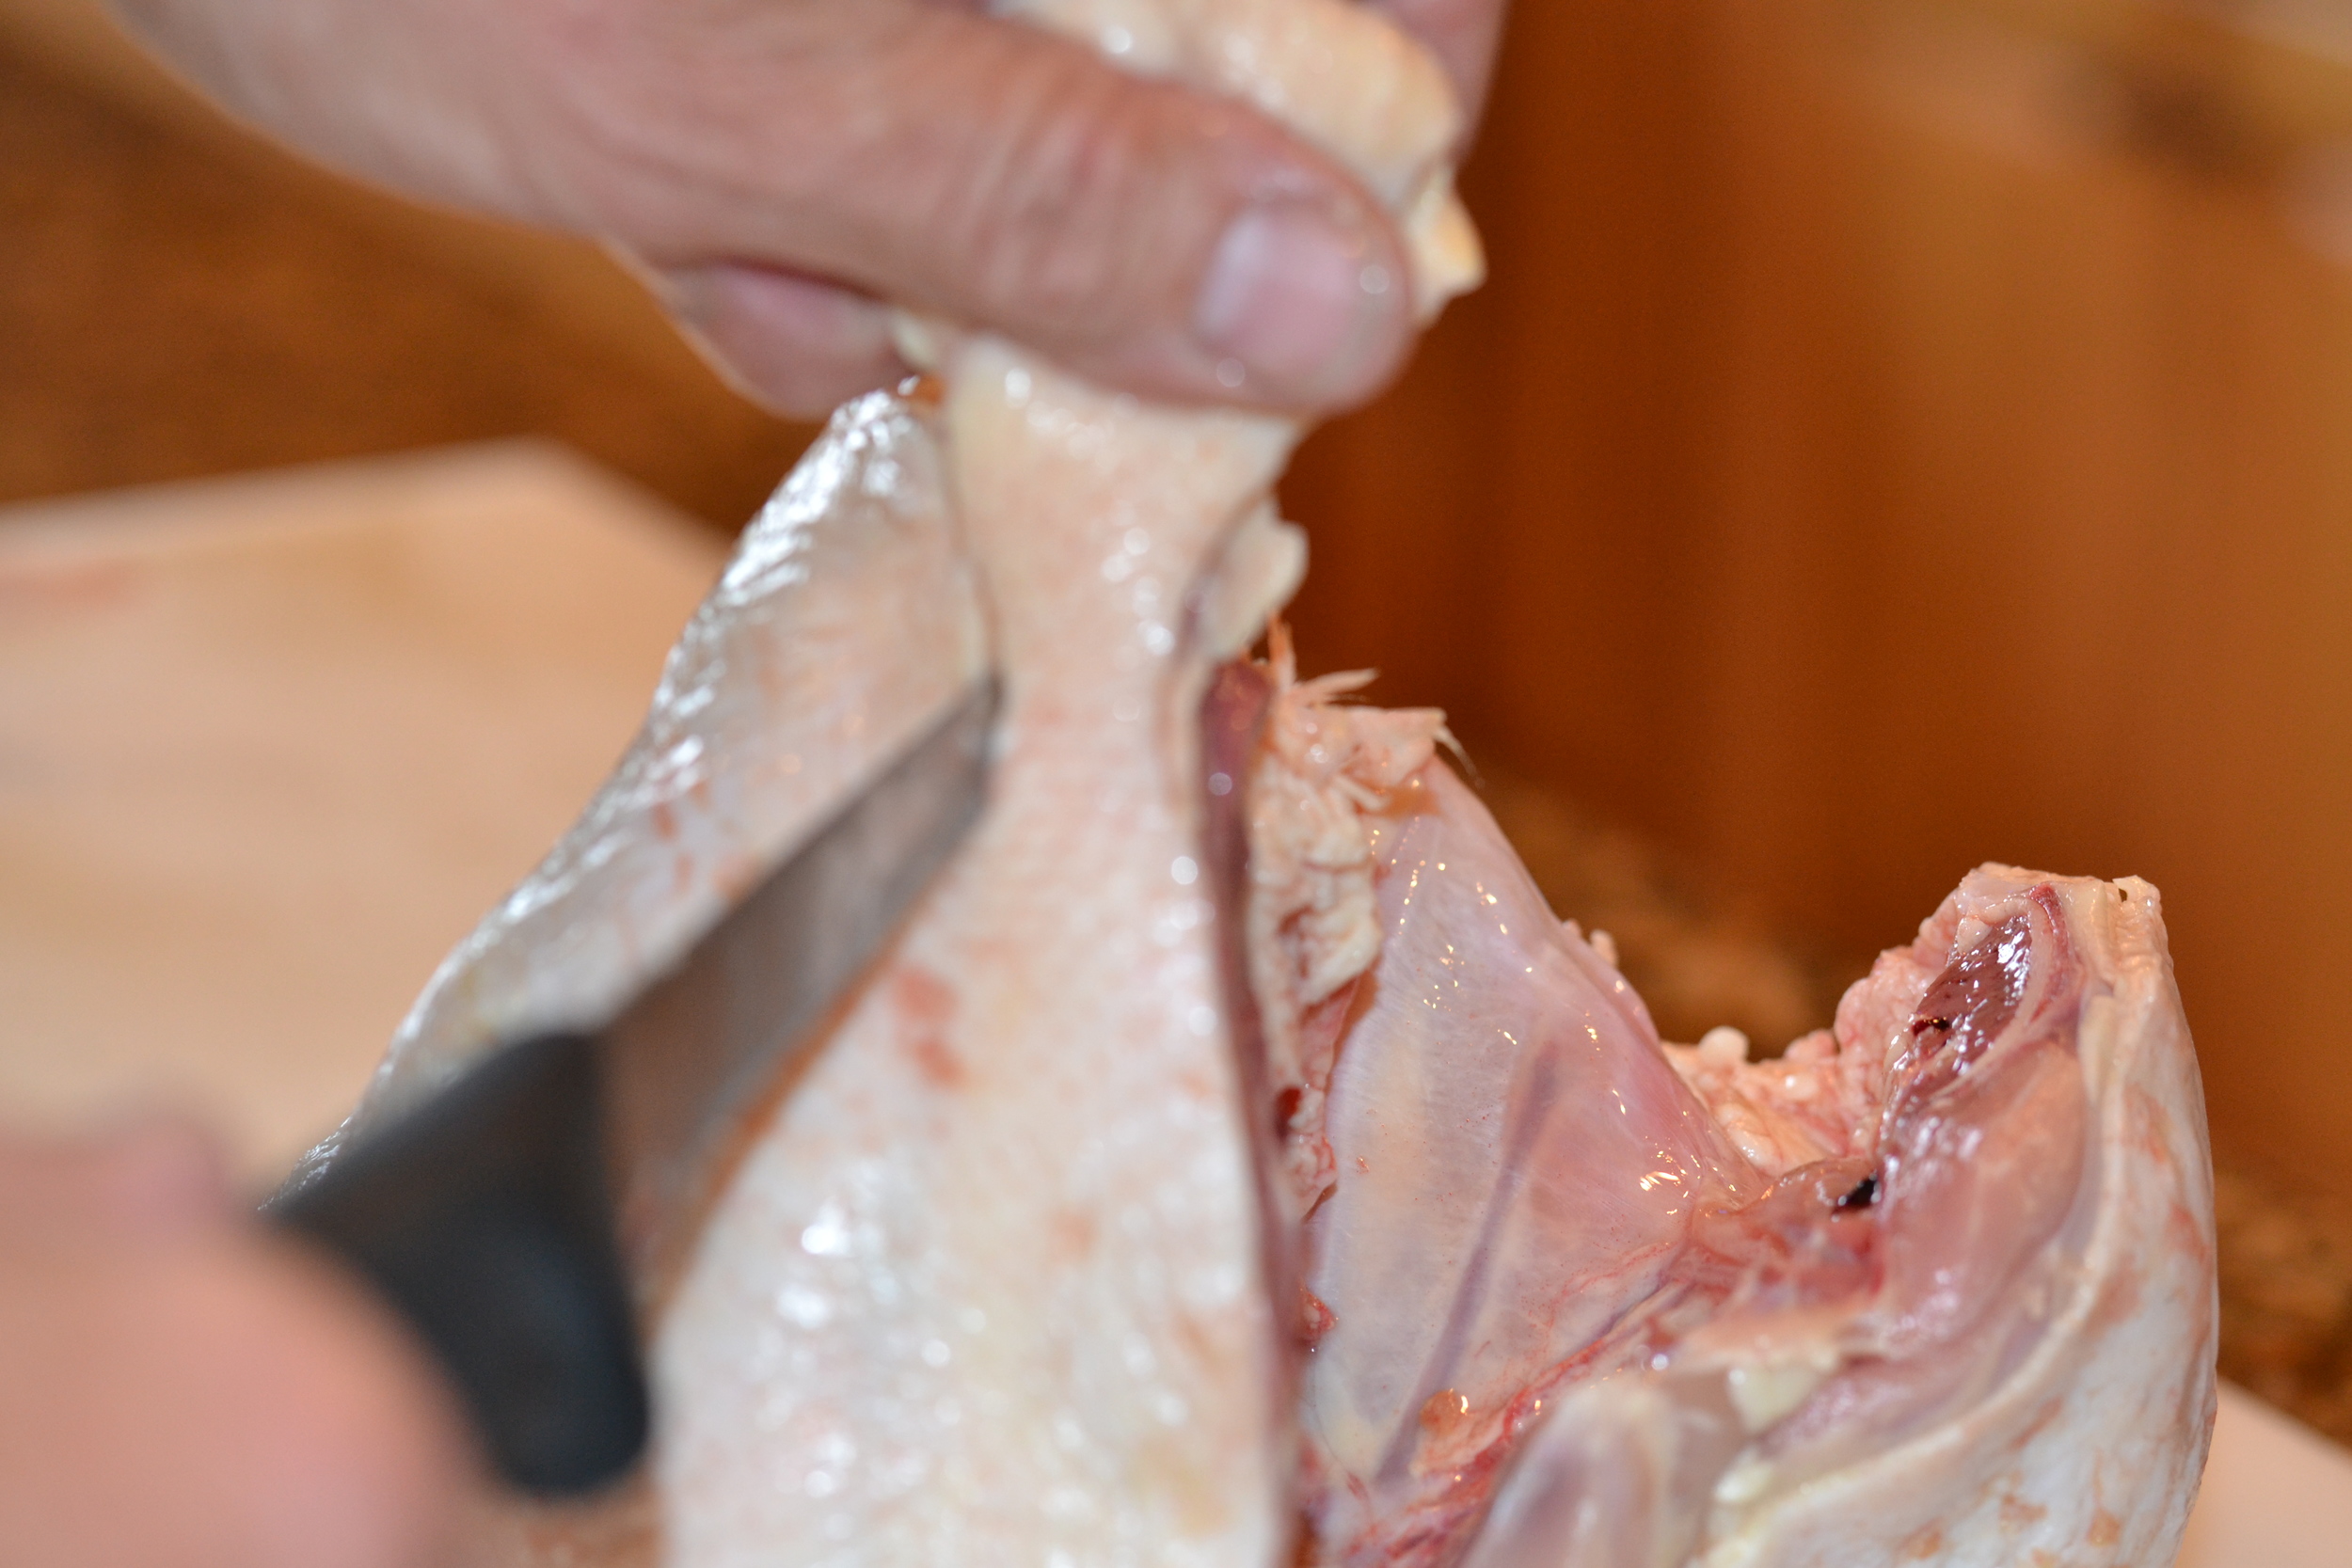
I like  to start by removing the wings first. Lay the chicken on your cutting table with the breast side down.  Grab one wing and pull it away from the chicken.  You can move the wing back and forth to find the joint.  Now cut through this joint and remove the wing.  Repeat with the other wing.  See, that was easy.

DSC_0104
DSC_0104

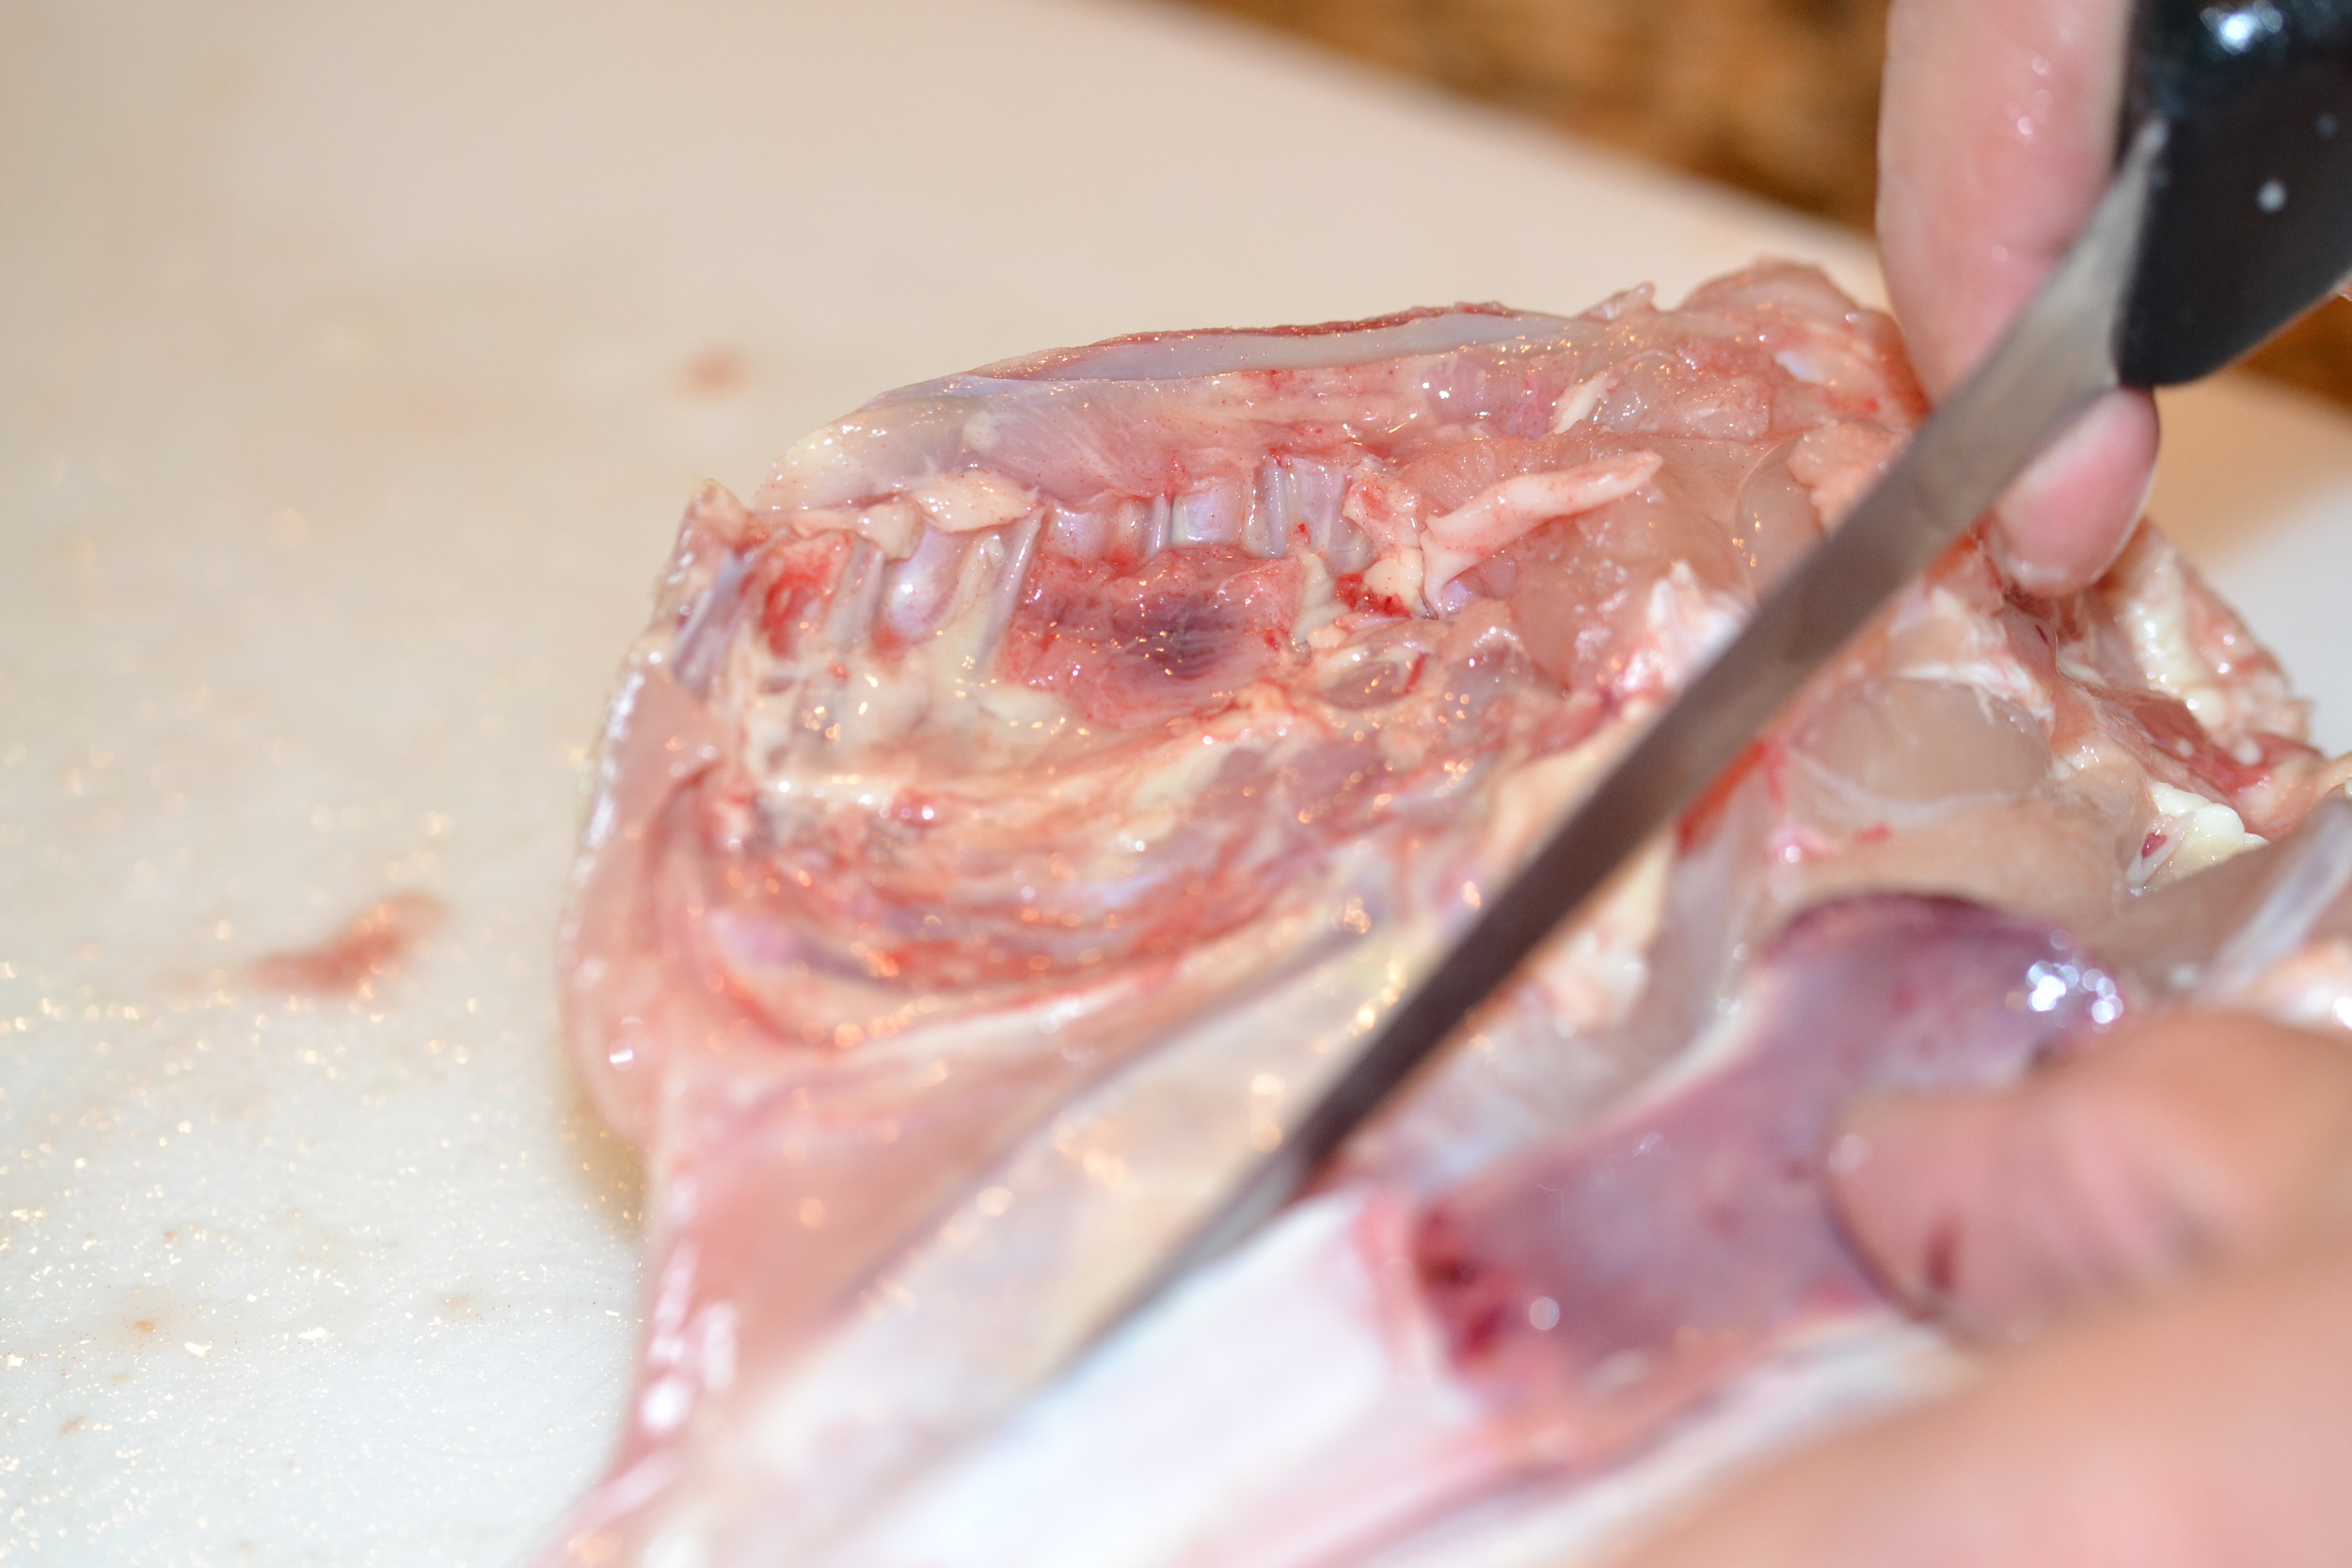
Next, I like to remove the backbone.  Two swift cuts on each of the vertebra and the backbone is removed.  You want this to be about 1 - 1 1/2 in.  wide.  You will need to grab the tail and hold the chicken up so that the backbone is vertical to your cutting board and is facing you.  Place your knife approximately 1/2 inch or so to the right of the tail.  Now make a quick and firm downward cut with your knife.  Two important tips:

1) Hold onto the tail tight.

2) Push your knife quickly and firmly.

DSC_0108
DSC_0108

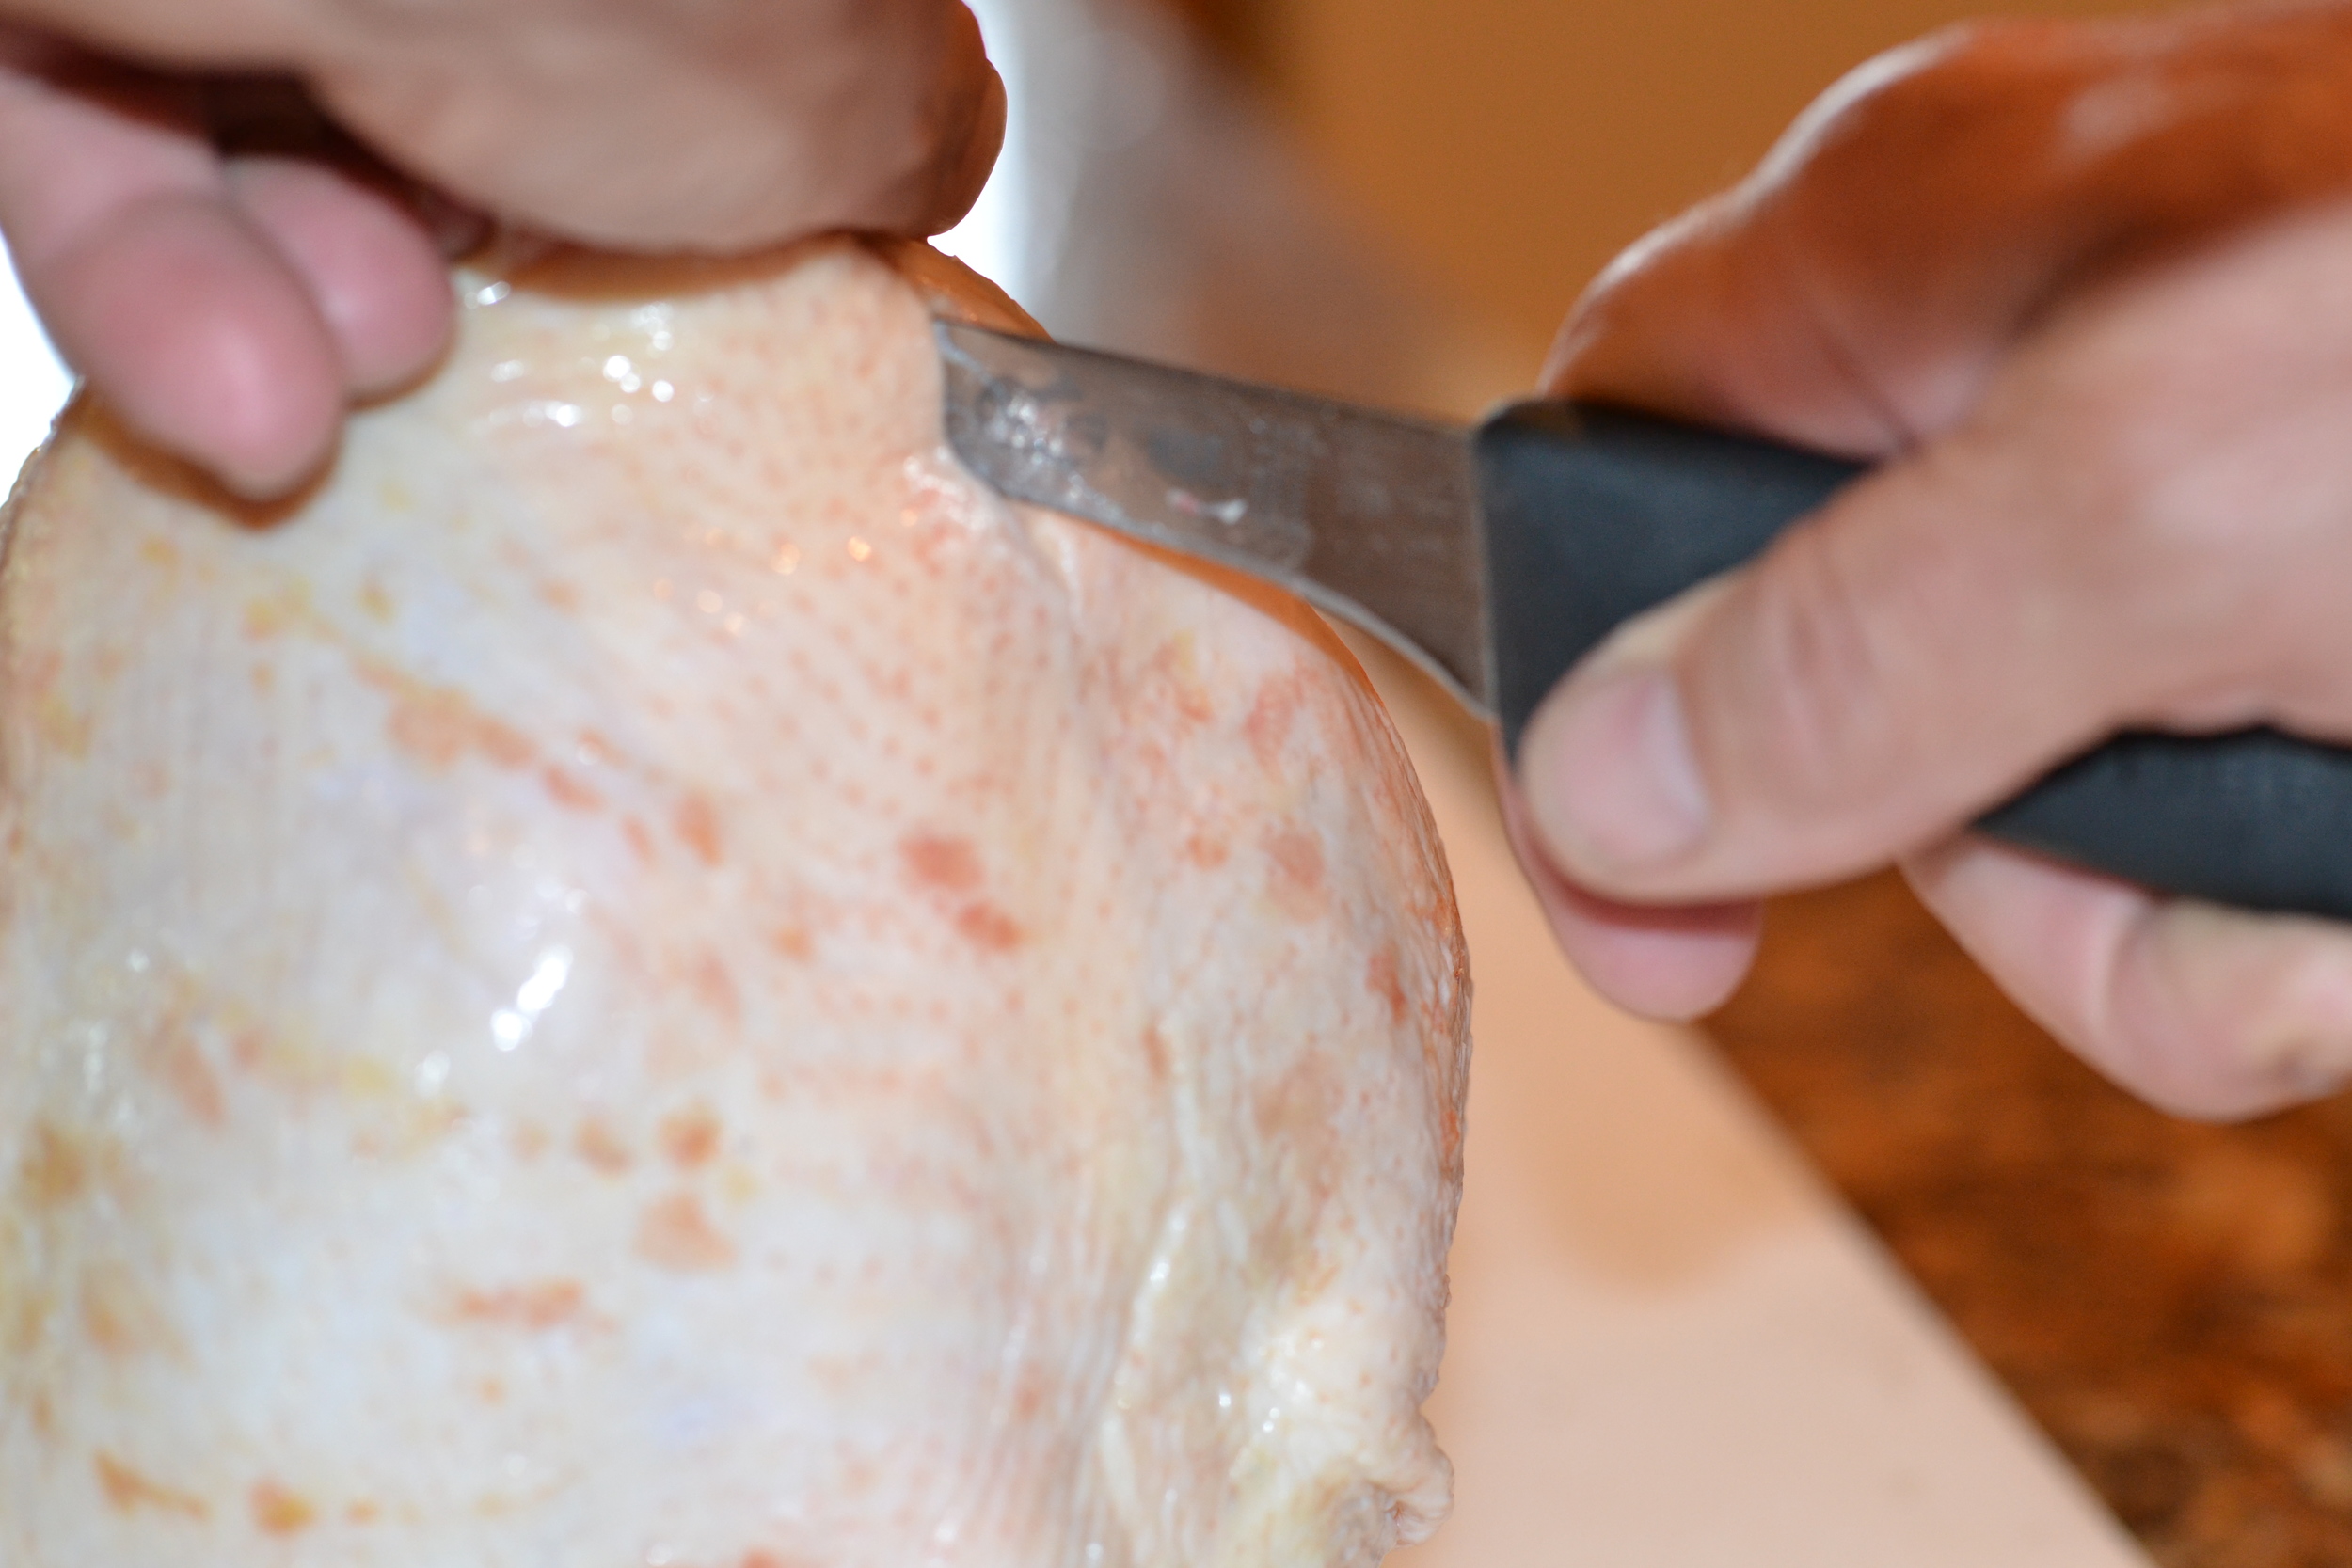
Now repeat on the other side.                                                                                                                   And the back is removed.

DSC_0112
DSC_0112
DSC_0117
DSC_0117

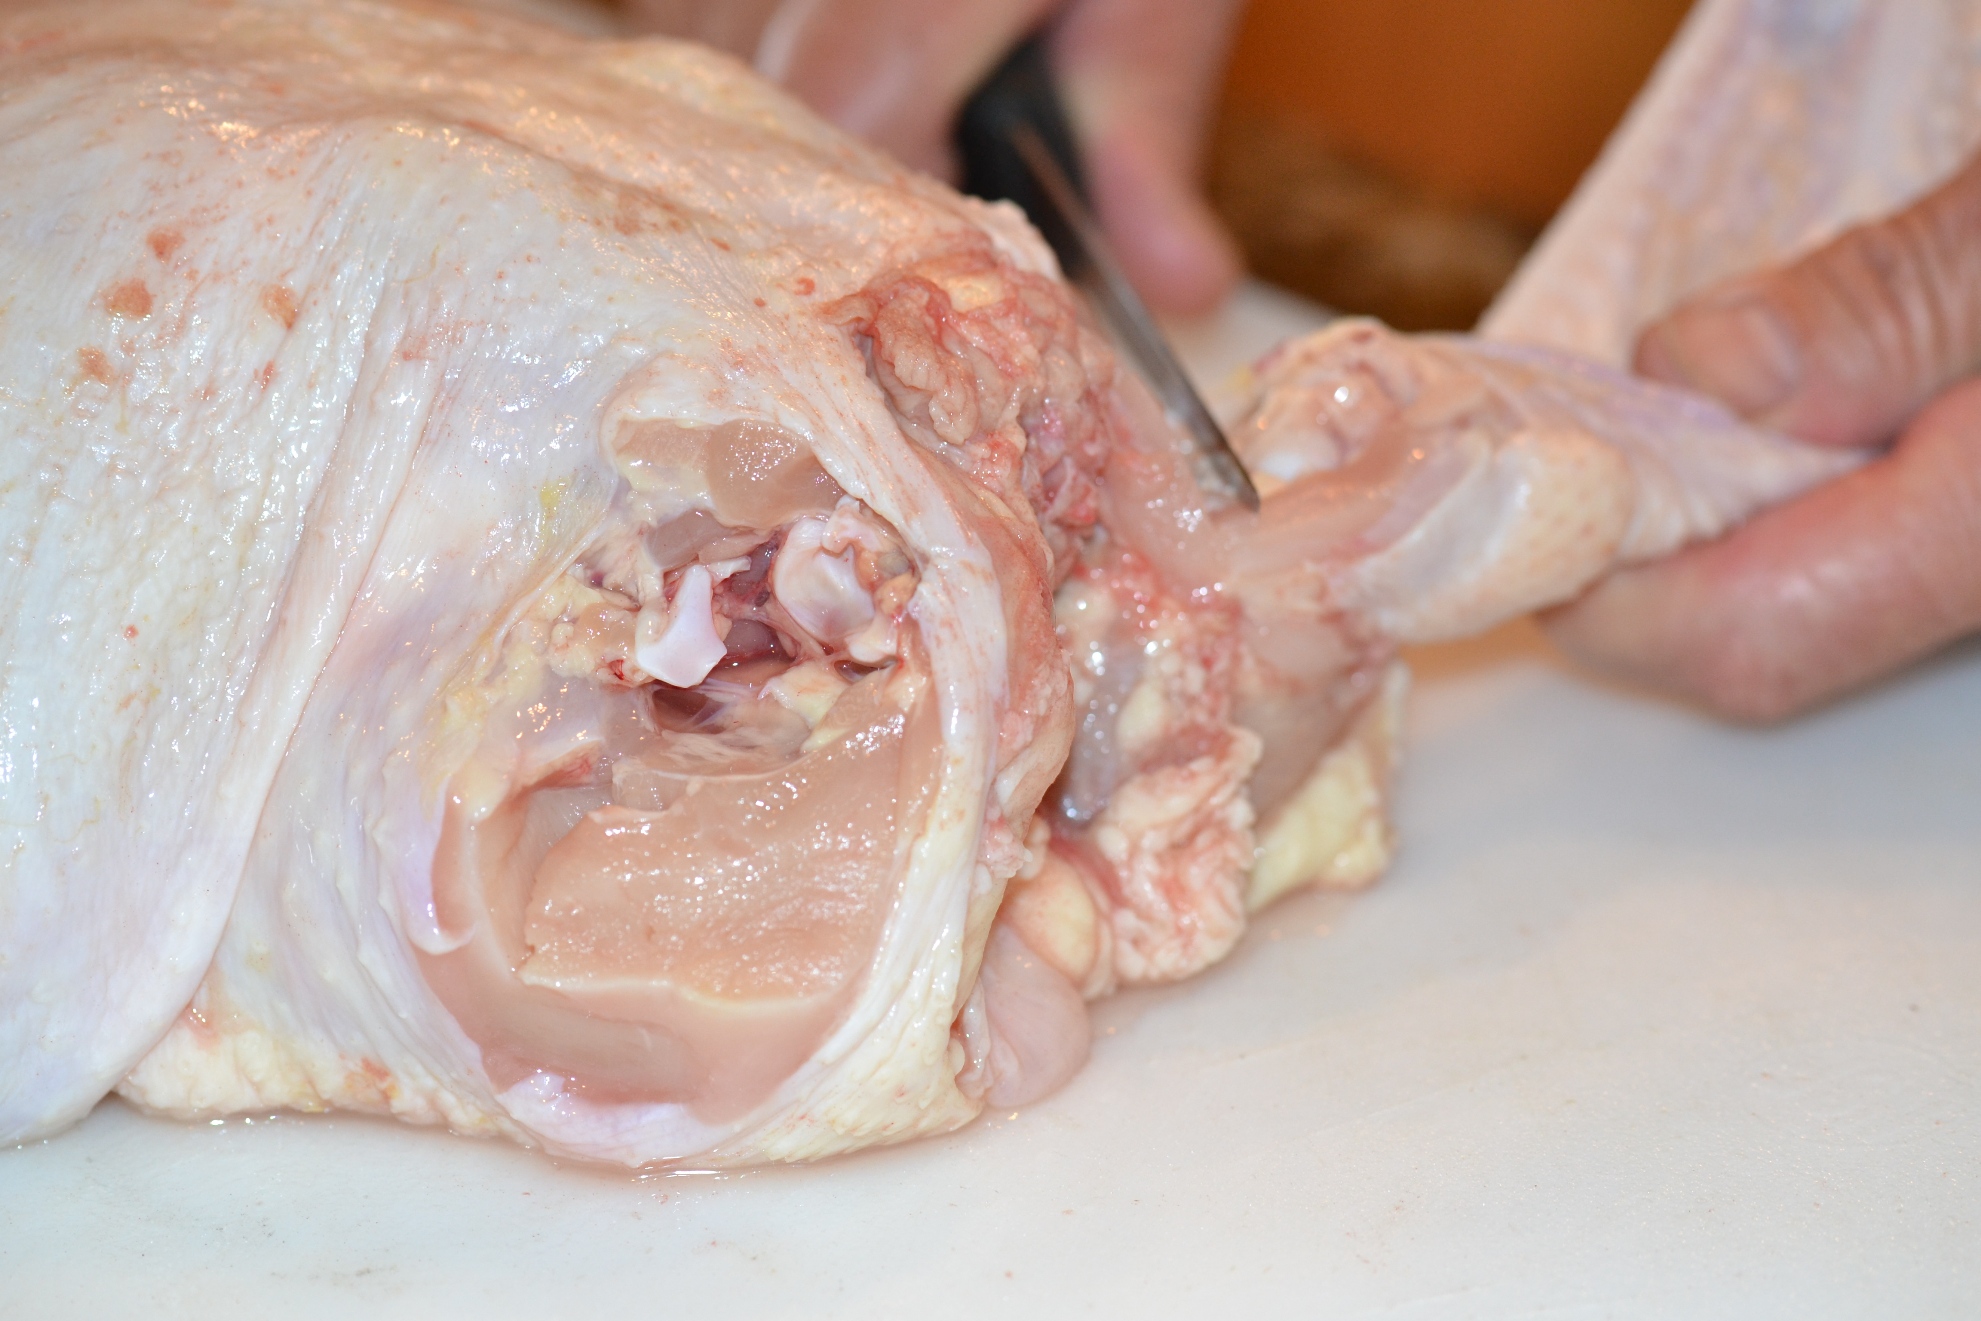
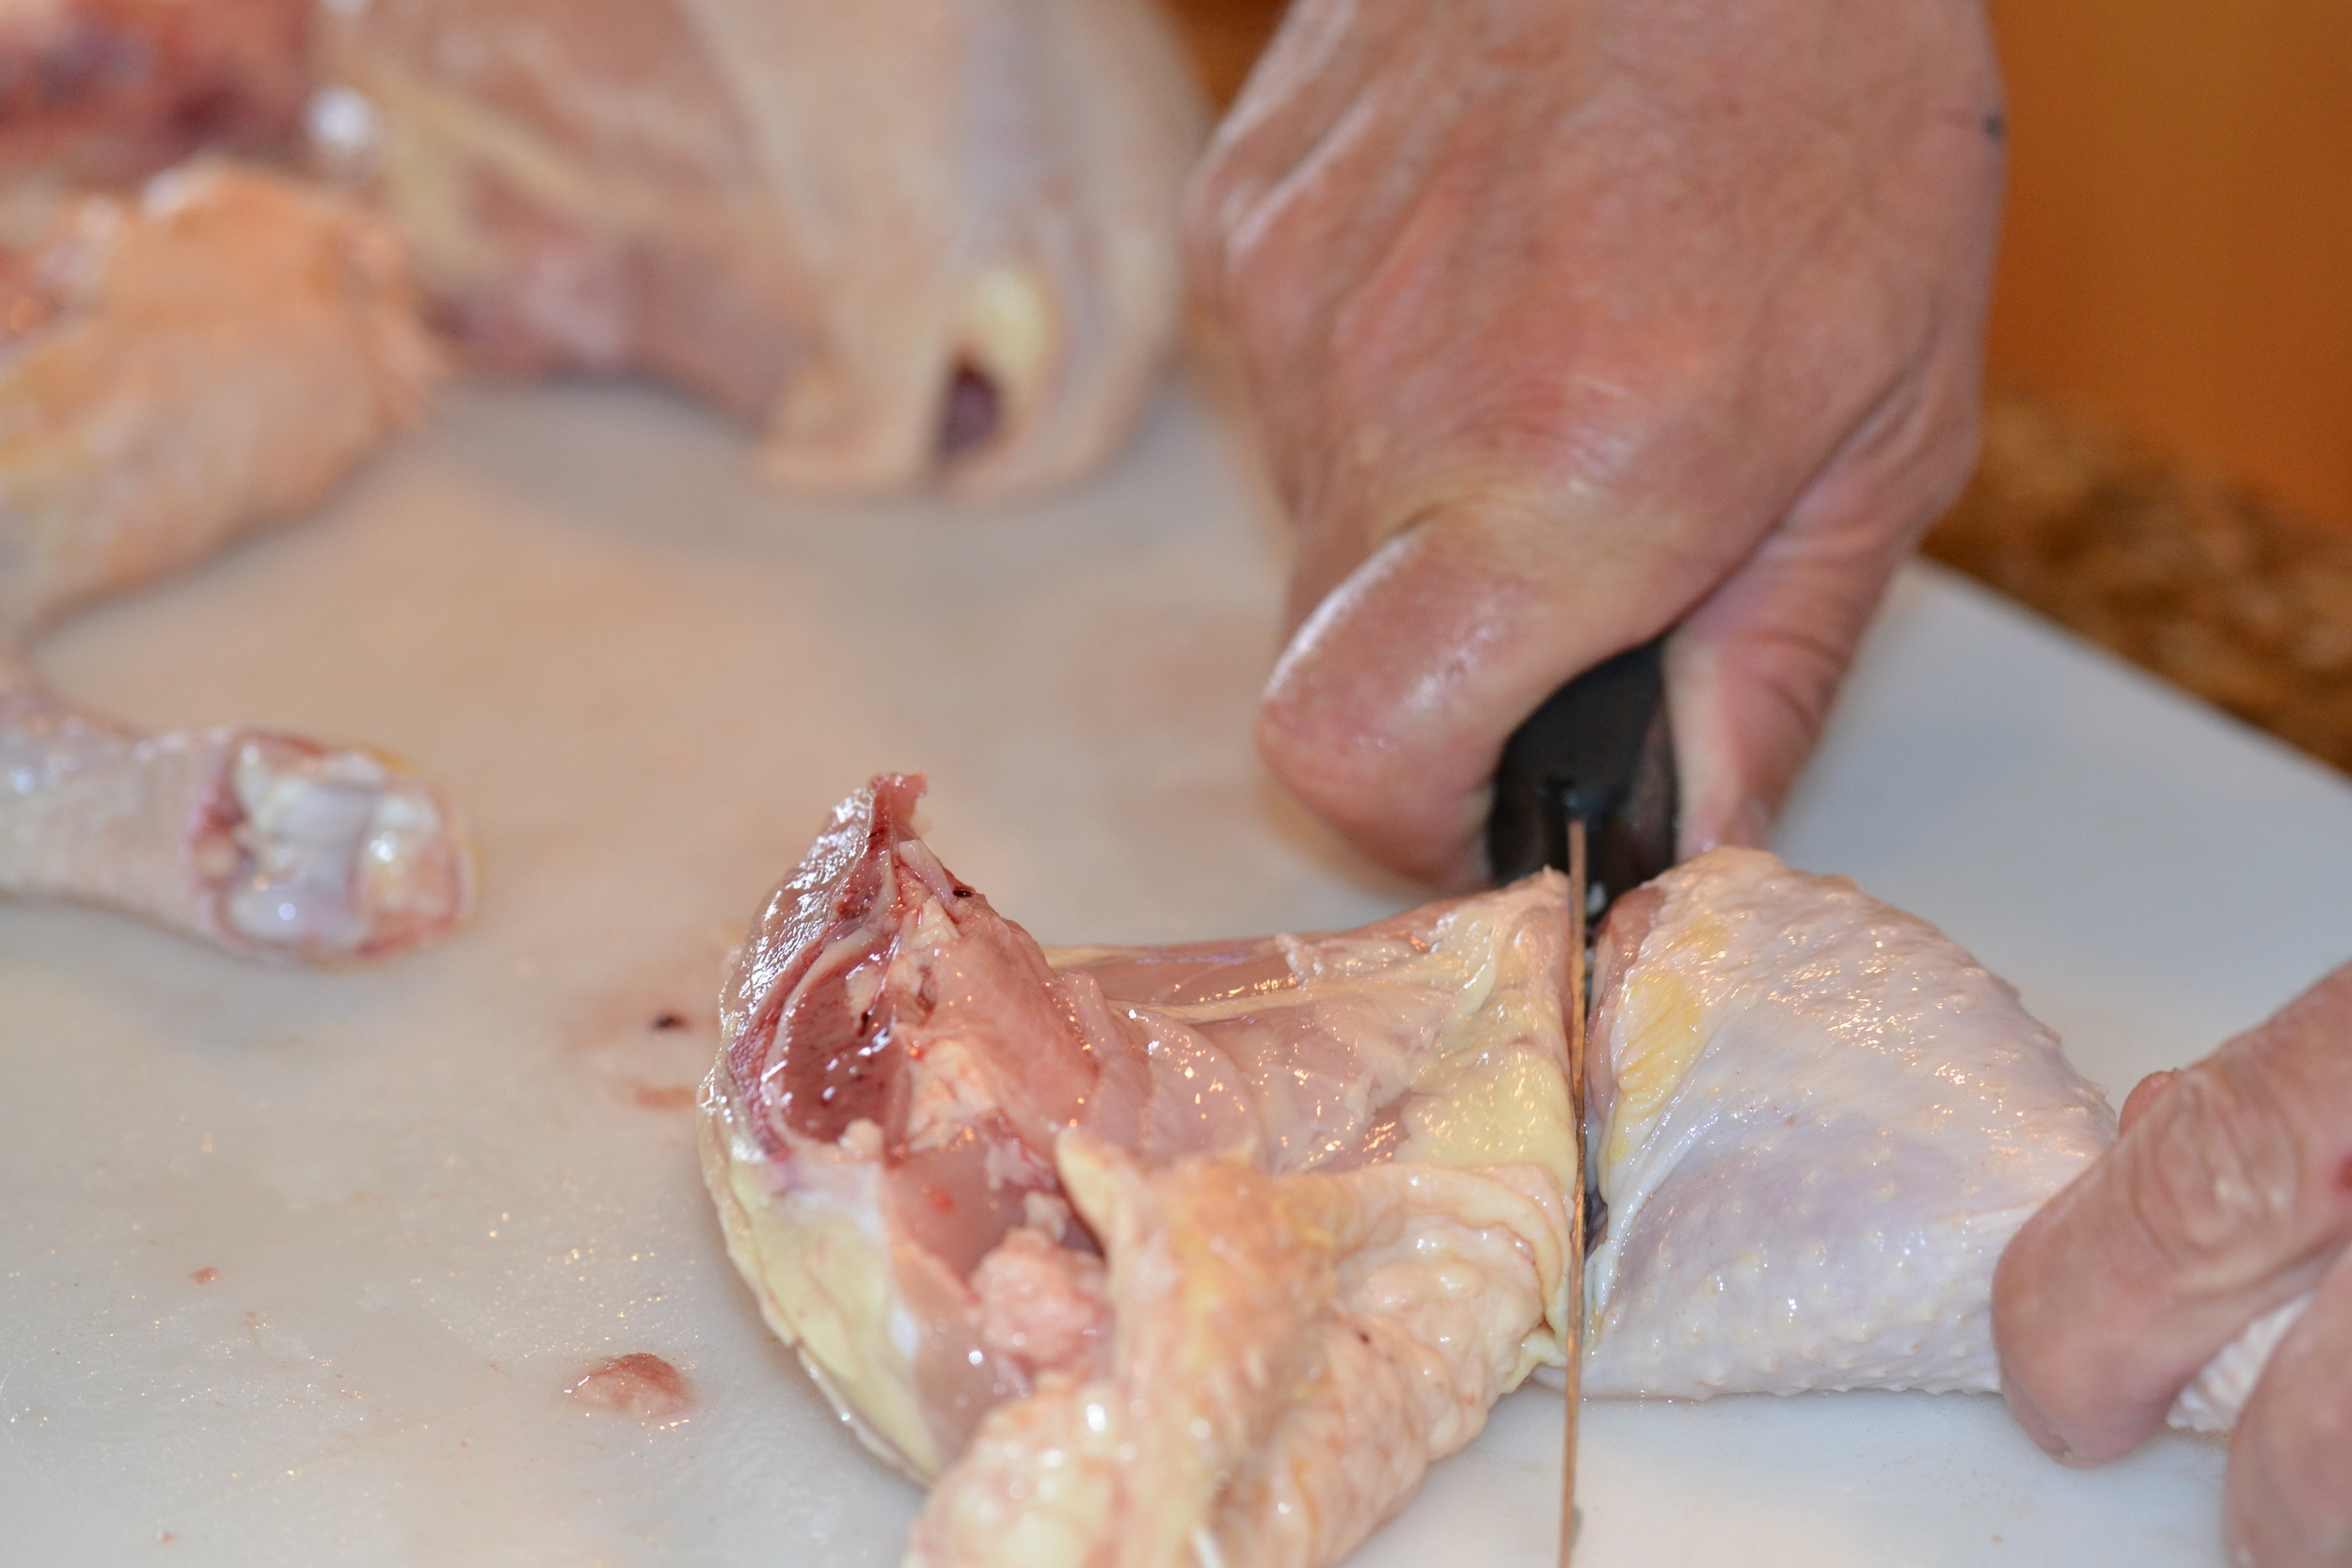
OK, now let's remove the legs. Turn the chicken so the breast side is up.  Grab the leg as seen in next photo and gently pull the leg away from the body.  There is a "natural" seam that separates the leg from the body so your knife needs to cut thru the skin.

DSC_0123
DSC_0123

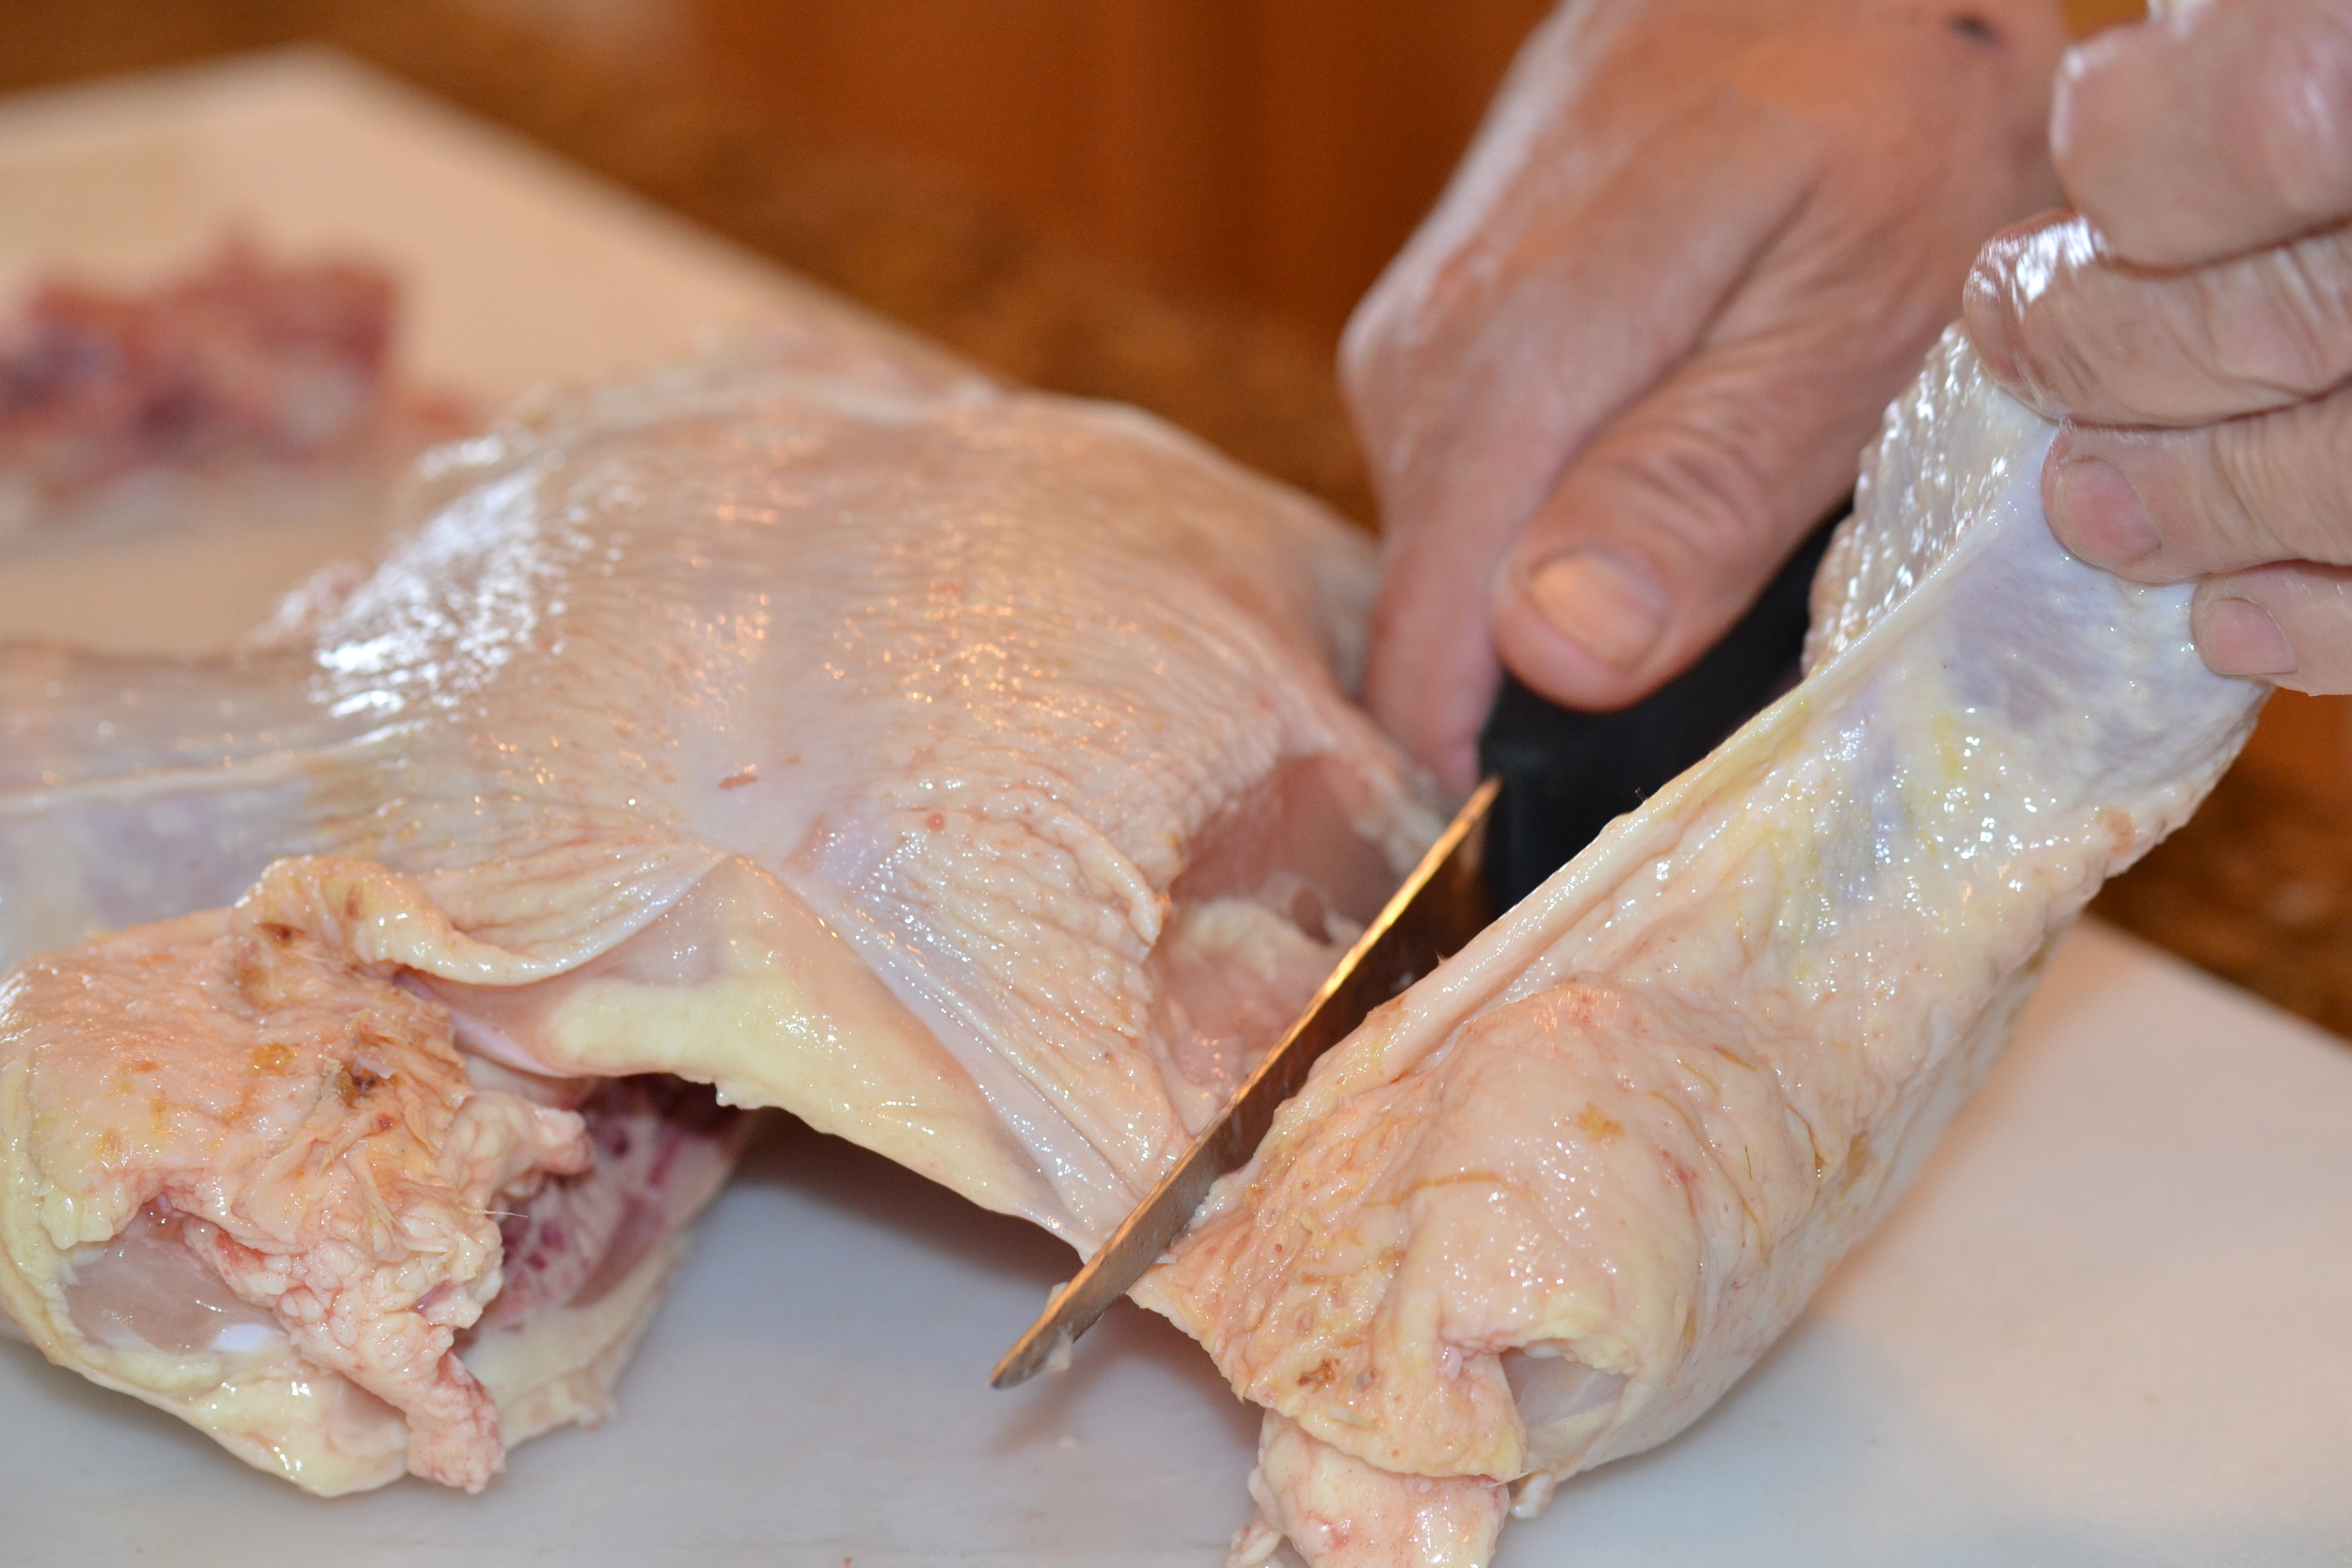
The thigh bone  is connected to the body at the hip.  Continue to gently pull on the leg separating it from the body as the knife cuts thru the joint.

A tip  -- you can "wiggle" the leg a little to help you see the joint.  Remember this is the hip joint and it is a ball in a socket joint.

Now cut through it as seen below.

DSC_0124
DSC_0124

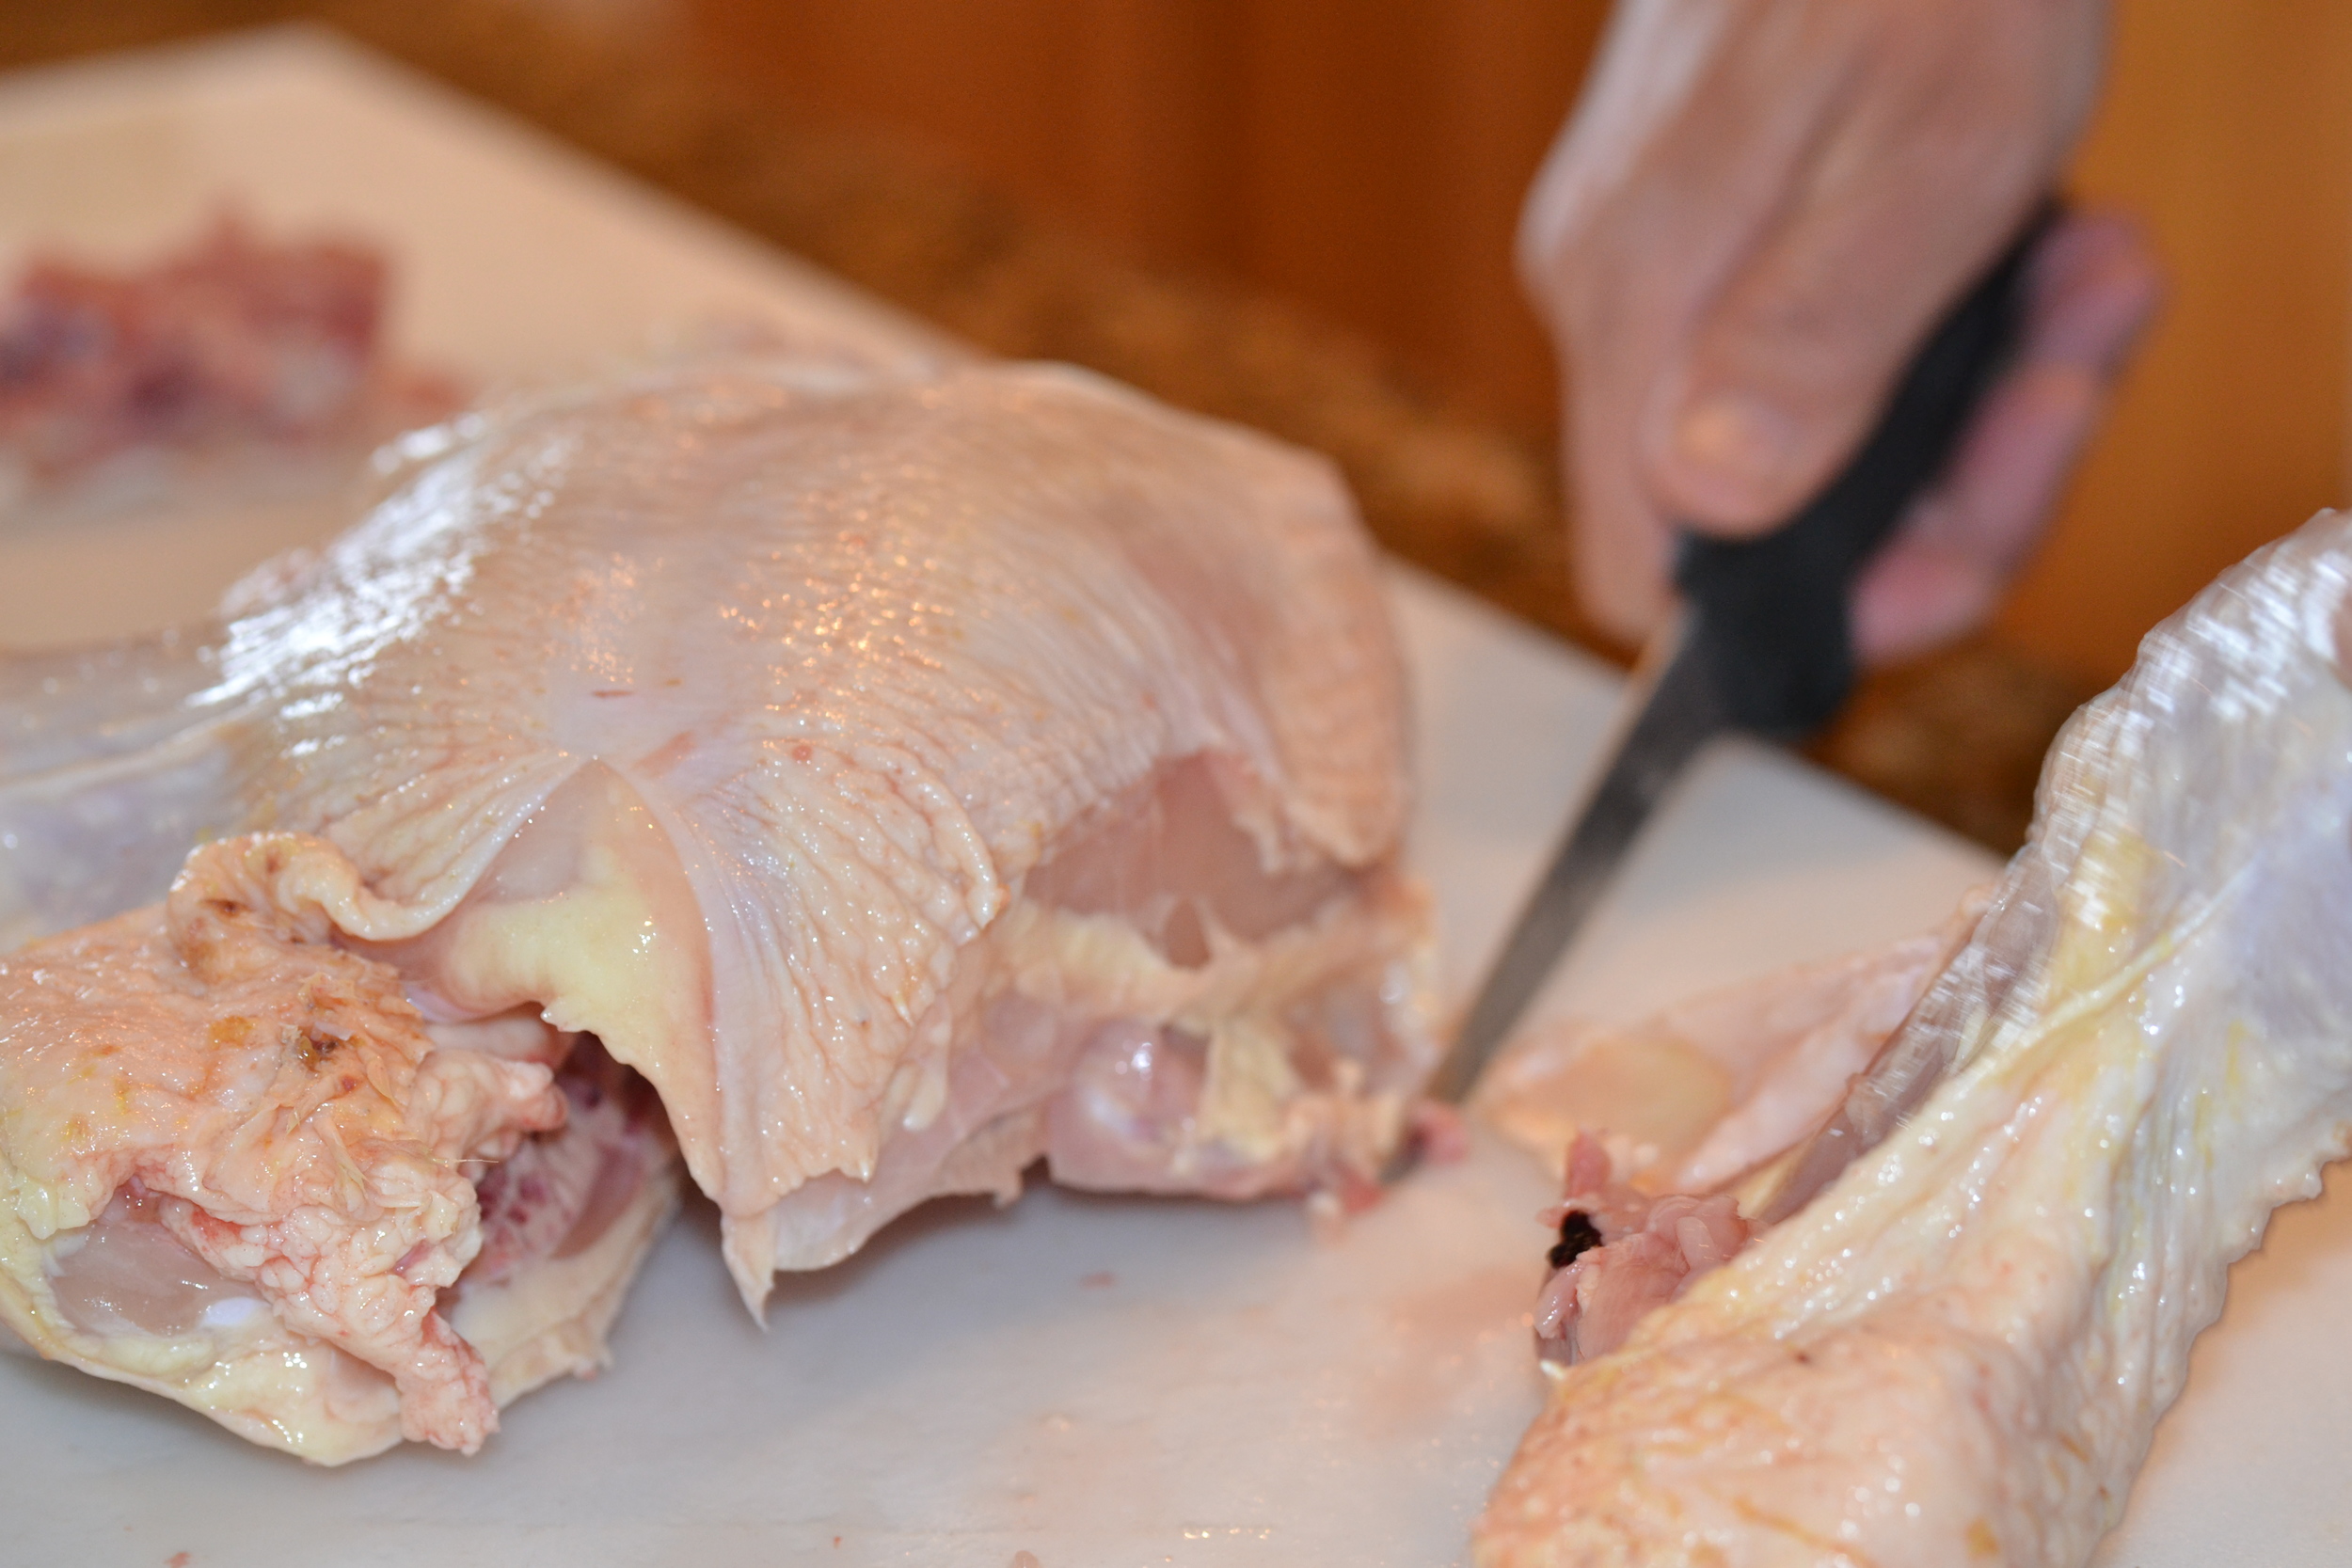
   OK, now cut off the other leg the same way.

Our next job is to separate the thigh from the drumstick.  Put your knife down and lay the leg on your cutting table skin side down.  Now while holding the drumstick, move the thigh back and forth.   See the joint move where the skin stops.  I call this the fat line or our cut line.

DSC_0129
DSC_0129
DSC_0130
DSC_0130
DSC_0131
DSC_0131

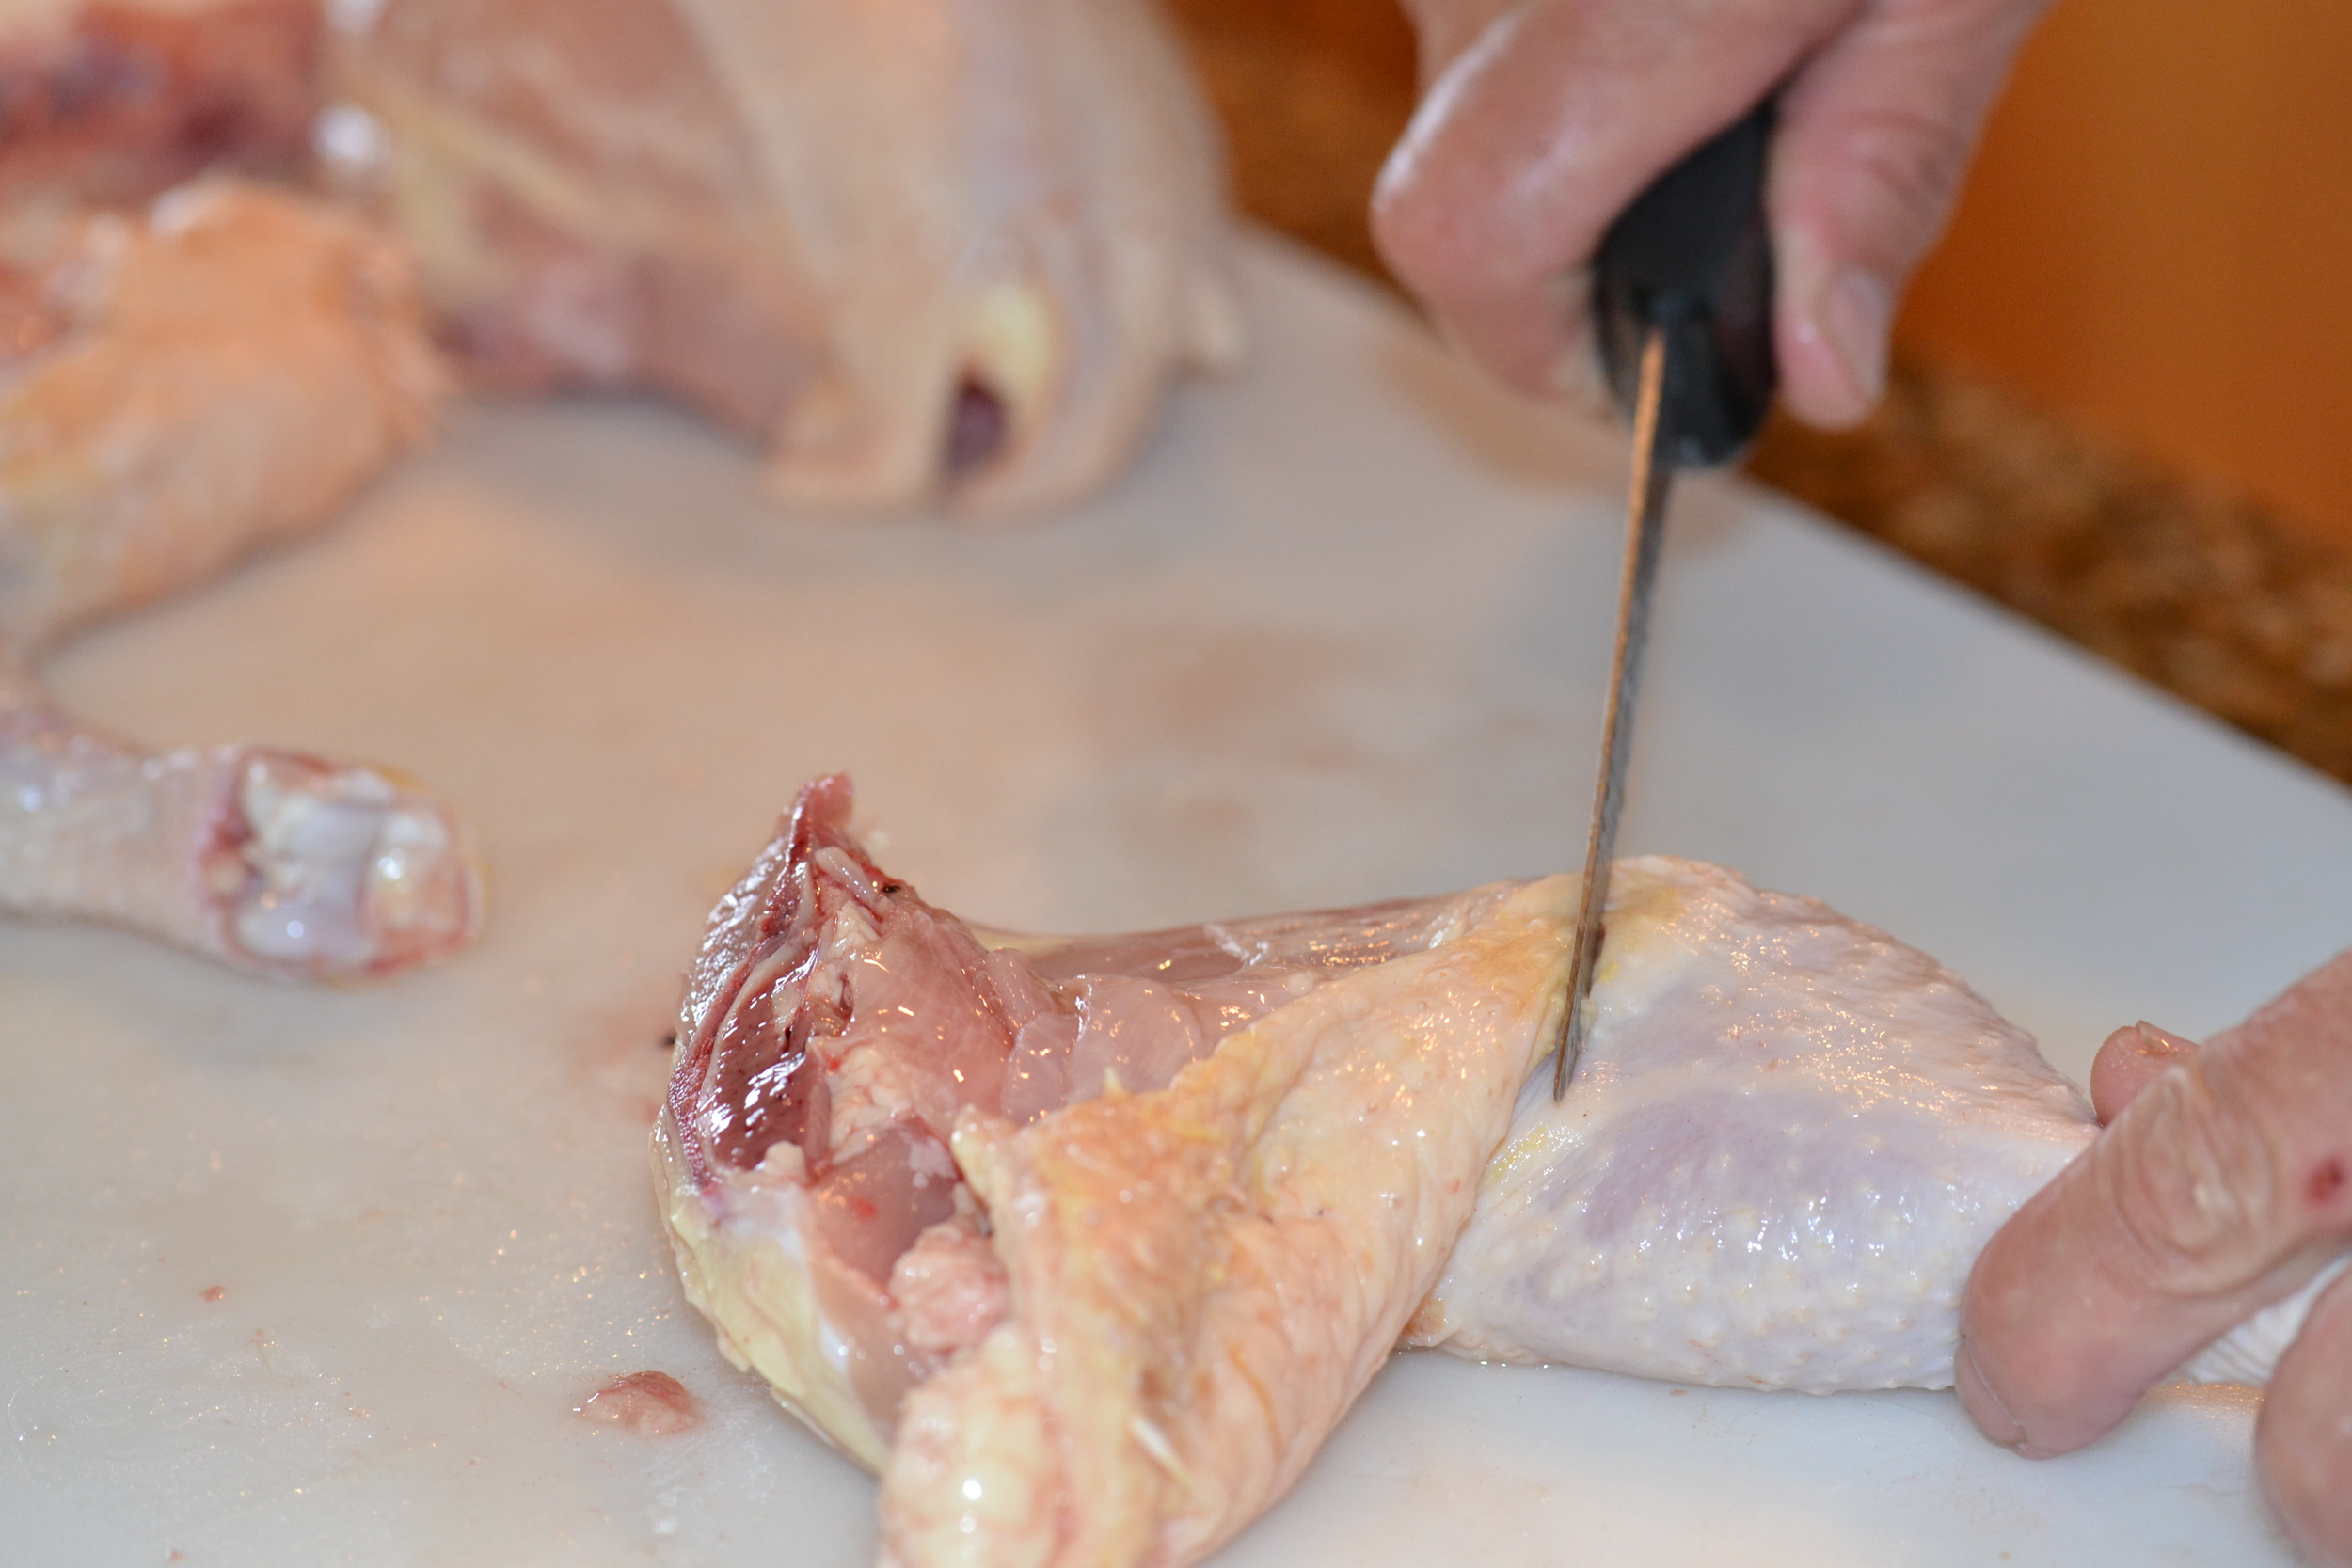
Make your cut there -- thru the joint, separating the thigh from the drumstick.                                

 We're almost done.  Lets split the breast into two pieces.

DSC_0141
DSC_0141

As seen in picture above is the whole bone in breast.  We could just take our good sharp knife and make a hard and swift cut through the breast bone and cut the breast into two pieces.  Or we could do what I prefer to do and that is to remove the breast bone and then cut the whole breast into two pieces.  When you go to your local grocer you will notice these called split breasts on the label.

DSC_0142
DSC_0142
DSC_0148
DSC_0148
DSC_0154
DSC_0154

And now we just need to use our knife to cut the breast in half -- thus the term split breasts.

DSC_0156
DSC_0156

 And now look what you have done -- what was a whole chicken is now 8 pieces that are ready to cook the way you want to and you saved money.

DSC_0160
DSC_0160

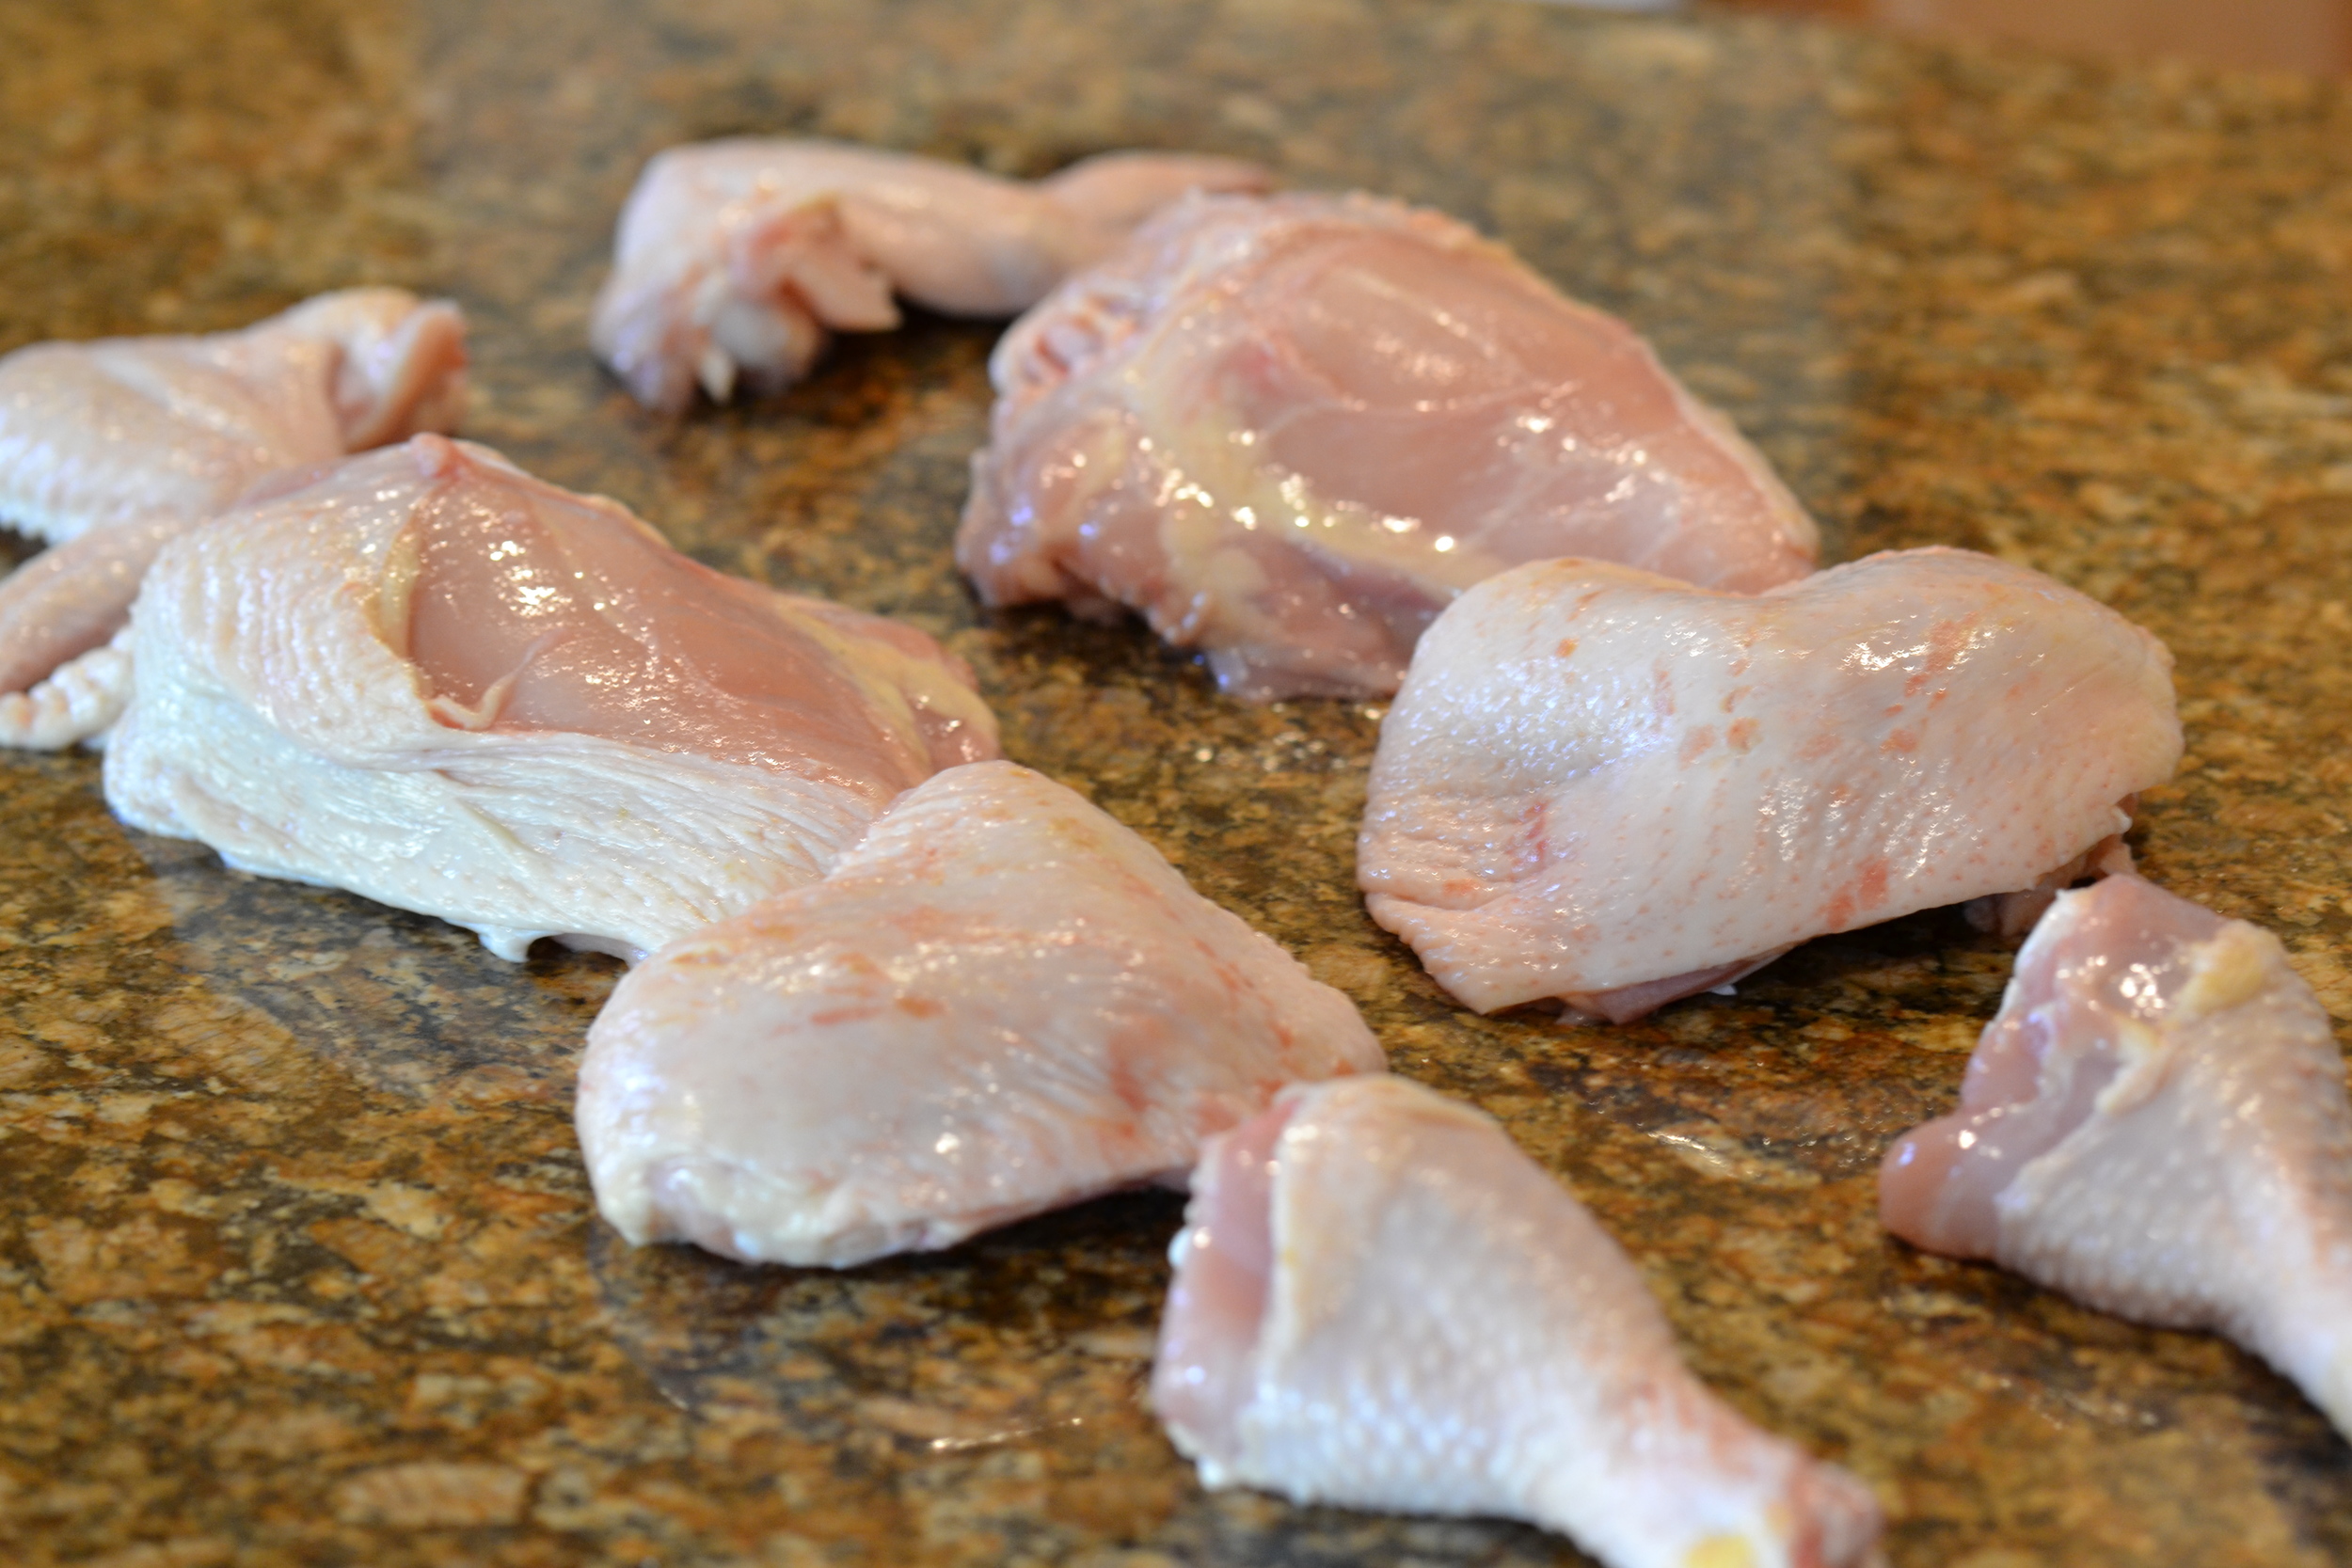
So let's look at the money.  I bought the whole chicken for $6.05.  Had I bought the 8 pieces seen above separately I would have spent $8.73 and would have saved $2.68 by purchasing the whole chicken and cutting it up myself.  You can do it.  Not bad for just one chicken. This may be slightly different for you based on the store you may be shopping at.  But, you can save money and know that you have a quality product that you, yourself produced.  

sign up for our email list to be notified every time we post (about once a week).

COOKING -- SOME COMMONLY ASKED QUESTIONS

COOKING: SOME COMMONLY ASKED QUESTIONS AND ANSWERS

Q. What is meant by the term braising when cooking?

A. Braising is the use of moist heat to cook a less tender cut of meat. Adding no less than a half inch of water or your favorite liquid such as a broth and cover the container. Maintain a temperature of 325 - 350 degrees F

Q. Is braising done on the stovetop or in the oven?

A. Braising of meat can be can be done in a covered heavy pot or skillet either on top of the stove or in the over.

Q. Is browning the meat prior to braising required?

A. The meat can be browned on both sides if desired. A seasoned flour can be patted on each side of the meat. This browning will add some flavor and color. Finish cooking with moisture in oven or on the stove top.

Q. When braising meat, is covering the pan required?

A. Yes. This lid will keep the steam produced from the liquid in the pan and this steam will soften the connective tissue of the meat making it more tender. when the meat becomes fork tender, it is done.

Q. What is broiling of meat?

A. Broiling is the use of dry heat to cook meat. This method is best used to cook the more tender cuts of steaks and/or chops.

Q. Can any piece of meat be broiled?

A. Not just any cut of meat but the more tender steak or chop cuts broil best. However, some less tender cuts of beef like a flank steak or a top round london broil can be after marinating them.

Q. What is pan broiling?

A. Pan broiling is using a pan or skillet on top of the stove to cook the steak or chop without the use of liquid. Medium high to high is recommended temperature setting.

Q. Does the thickness of the meat make a difference?

A. Yes. When broiling in the oven the meat needs to be ¾ inch to 1 ¼ inch thick. However when pan broiling we recommend ½ inch to ¾ inch.

Q. What is stir frying?

A. Cooking thin slices of meat quickly in a skillet with a small amount of oil on top of the stove using medium high heat. Meat ¼ inch by ¼ inch approximately 3 inches in length is ideal. Add quick cooking vegetables and your favorite seasoning when meat is close to being done.

Q. What is roasting?

A. Roasting is the cooking of an uncovered piece of meat in an oven or similar appliance.

Q. What meat is best for roasting?

A. Use some of the more tender cuts such as beef rib (boneless or bone in), top round, sirloin tip, pork loin and fresh ham. Lamb as well as veal leg and shoulder cuts also roast well. Remember you should use a piece of meat that weighs more that 2 ½ lb.

Q. Should a rack be used when roasting?

A. Yes and no. The purpose of the rack is to keep the meat out of the drippings as the meat cooks and to allow air air to circulate around the roast. So, yes a rack is needed unless the meat has bones in it. Bones will raise the meat off the bottom of the pan and allow air to circulate around the meat.

Q. Should I cover the roast while it cooks?

A. No. Covering the pan with foil, or wrapping the roast with foil, or using a cooking bag is actually braising. Because we are using some of the more tender cuts, braising is not needed. Also, the browning of the exterior of the meat adds flavor to the roast.

Q. Should I season the meat before or after roasting?

A. This is personal preference. I personally like to season the meat the night before. I will rub the spices all over, cover the meat with plastic and place in the refrigerator. Be sure to unwrap prior to placing meat in oven.

Q. At what temperature should I roast meat?

A. Some feel that the oven should be set at a high, 375 - 400 degrees F for 15 - 30 minutes. Less time for a smaller roast. This higher temperature helps ‘seal” the outside to help hold the juices in. However, this high temperature will cause more cooking losses. We recommend roasting at 250 degrees F - 325 degrees F. The larger the roast, the lower the temperature. This lower temperature helps cook the meat at a slower rate and more uniform throughout. An over 8 pound roast needs this lower temperature to cook evenly.

Q. What is the difference between thermostat and thermometer?

A. A meat thermometer registers the temperature of the roast. The thermostat controls the oven temperature. Knowing that both are accurate is very important. You will need to know that the temperature the thermostat is set at is the oven temperature. The thermometer will also let you know how done the meat is.

Q. How do I know when the roast is ready to be removed from the over?

A. First you will need to decide how done you want it Following are some guidelines. Remember the more done the roast the dryer the roast as more moisture will be cooked out of the meat.

Rare 125 - 130 degrees F

Medium Rare 130 - 140 degrees F

Medium 140 - 150 degrees F

Medium well 150 - 155 degrees F

Well over 160 degrees F

You will need a stick thermometer, placing it into the center of the roast. Be sure that the end of the thermometer is not touching any bones. Bones will conduct heat faster than whole muscle meat. You will want to remove the roast from the oven when your thermometer registers about 7 - 10 degrees less than your desired final temperature. After the roast is removed from oven, place it (still in roasting pan) on counter top, cover with foil or maybe a clean cloth for 10 - 15 minutes. The roast will continue to increase in temperature the 7 - 10 degrees needed to reach your desired final temperature. This also helps the meat hold onto more juice -- thus making for a juicier cut of meat.

Q. How long do I cook this roast?

A. As we all know oven temperature will vary from oven to oven. And then to make things more confusing the roast size and type will affect the time. Also, does the roast have bones or is it boneless? These all affect the time. And don’t forget the beginning temperature of the piece of meat. But, with that said, a good rule of thumb that I like to use is 35 minutes per pound in a 275 degree F oven for an internal temperature of 150 degrees F.

Remember that the lower the oven temperature the less browning of the roast. The browning of the outside of the roast will change the flavor slightly. If you desire this than raise the temperature to 375 for the first 45 - 60 minutes and then drop the oven temperature to the 275.

Remember from your school day science class that water boils at 212 degree F. So why cook the roast at a high temperature and boil all the water (juice) out of the meat?

We have attached a link to a roasting chart that you may feel of benefit.

http://www.foodsafety.gov/keep/charts/meatchart.html

Remember, please feel free to post comments and questions.

sign up for our email list to be notified every time we post (about once a week).

Smoking Turkey Breasts

Our local grocer had a great buy on some frozen turkey breasts so I thought I would purchase a few and do some smoking.    And I must say they turned out delicious and I learned a little trick that I will be passing on to you.

Stopping at a local grocery store on Monday I purchased three frozen whole turkey breasts (bone-in). I brought them home and placed them in our refrigerator that we have in our garage.

On Wednesday I mixed up the brine.  The brine I used consisted of water, salt, cure, and brown sugar as the main ingredients.  See the picture for all the dry ingredients.

I used a cooler to mix the brine and the turkey breasts.  I did make sure it was clean.

Now that all the ingredients are mixed in the water and and most have dissolved completely, we need to add the turkey breasts to the mixture.  Remember to wash your hands and anything else the raw turkey may touch.

When adding the turkey breasts to the brine mixture I noticed that they were not completely thawed --- but that's OK. Remember the brine is high in salt and we all use salt to melt ice.  In addition to the salt the temperature on the tap water we used was probably around 65 or 70° F  . So that alone will help finish the thaw.

On Thursday we mixed about 12 oz. of honey from a jar with about 24 oz. of brine.  You don't need to be exact just about a two to one ratio will work.  Whatever is left over will be poured back into the brine. So we pumped each side of the breasts with a mixture of honey and brine. See pictures below.

Put them back into the brine solution until Saturday morning.  At this time I removed the breasts from the brine and let soak in plain water for about 15 minutes. This just helps remove some of the excess salt from the outside. Then it's smoke time.

.

I used hickory and apple wood for smoking. You can use whatever you prefer.  I got the pit good and hot and then let the fire die down to almost out but there were still plenty of hot embers.

Roll the smoker over the pit and about 4 1/2 hours later  --  165° F  internal temperature.  Your time may vary but just make sure the internal temperature is 165° F.

Remember, keep the temperatures of the smokehouse below 210° F. This makes for a little longer cooking time but remember -- you are smoking the meat.

And now for the tip I promised you - I removed the skin from one of the turkey breast before smoking. This allowed the smoke to penetrate the meat and no noticeable drying out.  Note the one on the right in the picture has the skin removed.

After removing from the smokehouse we placed one the kitchen for about a half an hour.  We then placed in the refrigerator for the night.

I must say, they turned out pretty good.  We removed the bones and passed out to some neighbors who agreed with me -- they were delicious.

sign up for our email list to be notified every time we post (about once a week).