Old fashioned kielbossi made with fresh pork shoulder butt. A family favorite here.
Kolbossi, Kilbossi, or however you spell it -- this is just good stuff. You may think it to be a little more work and time than you want to spend but afterwards you will have to admit that it was time well spent. And we’ll have fun as we go. So let the good times begin.
We started with two whole pork shoulder butts that we proceeded to remove the bone from so that we could separate the lean from the fat.
Now, what I mean by separating the lean is to remove the large lean muscle pieces that are visually 95% lean or leaner.
We ended up with a little bit more lean than fatter meat. I weighed both and noted that we had 8 lb. of lean meat and 6 lb. of the fatter meat. As long as we had equal amounts or more lean meat I am happy.

We keep the lean meat in one container and the fatter meat in another container. Next we cut the meat into pieces that would fit into our Kitchen Aid grinder and we added our salt and cure (prague powder/pink salt). Our salt and cure is for 14 pounds of meat, and we have two containers, one with eight pounds and the other with six pounds. We did our best to get the right amount of salt and cure on each. After all, it will be all mixed together later. So, now we cover each container and put in the refrigerator overnight. As we may know the cure will turn the meat a brown color as it reacts with the meat. Note pictures below.
Let’s not get into the chemistry of how and why this happens today. We’ll do that at a later date.
For now, just trust me when I say this is a normal look.
I like to have the meat with salt and cure set overnight. This helps with the salt reacting with the meat protein so that they can hold onto more water during the cooking process, thus making for a more juicy kielbossi. This step in not necessary but just my preference.
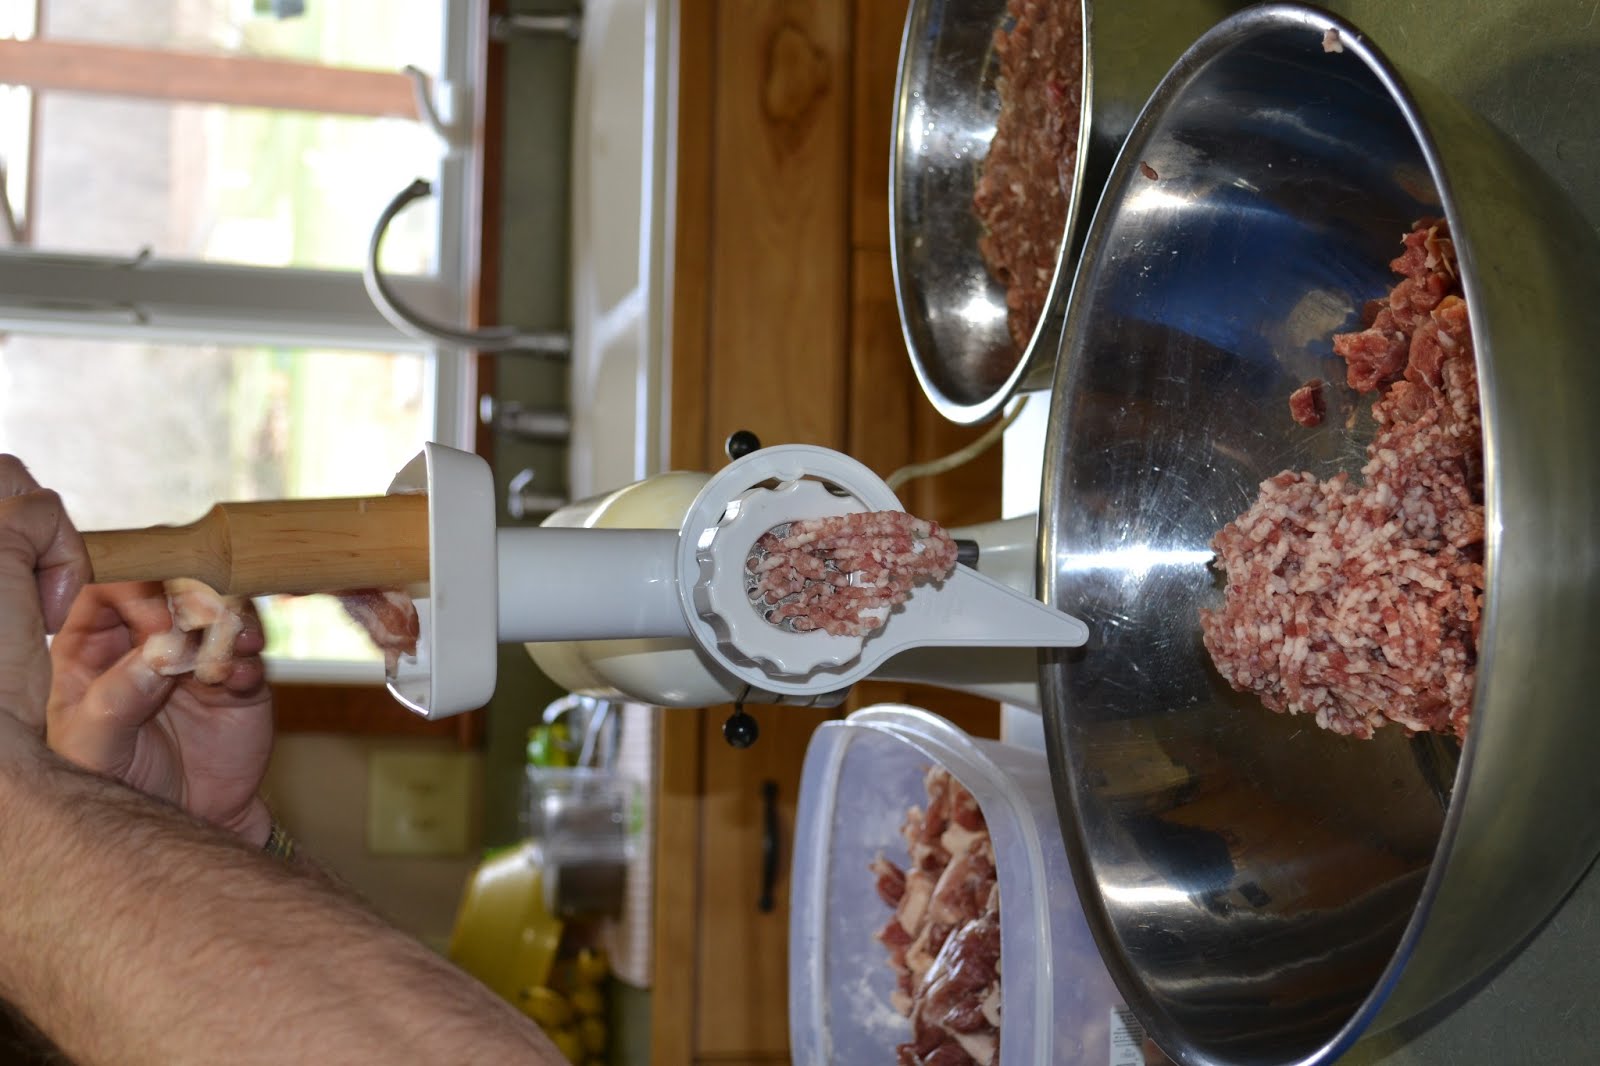
So the next day we remove the meat from the refrigerator and we grind the lean meat through our course grinder plate of our Kitchen Aid mixer. And then we grind our fatter meat through our finer holed grinder plate. Remember to keep the meat moving through the grinder so that grinder knife and plate don’t warm up too much. This will cause damage to the meat proteins.
And now in a large container we mix all the meat with the remainder of the spices and ice water. Remember, your tap water temperature is probably 50 - 65° F and we want to make sure we keep the meat cold. So I filled a container with a little more water than we will need and add 10 - 12 ice cubes. Let this set to chill while we grind the meat.
We make sure that we spend a little extra time mixing using only our hands. This stuff is really cold! But that is what we want and need, so let's grin and bear it as we continue to mix.
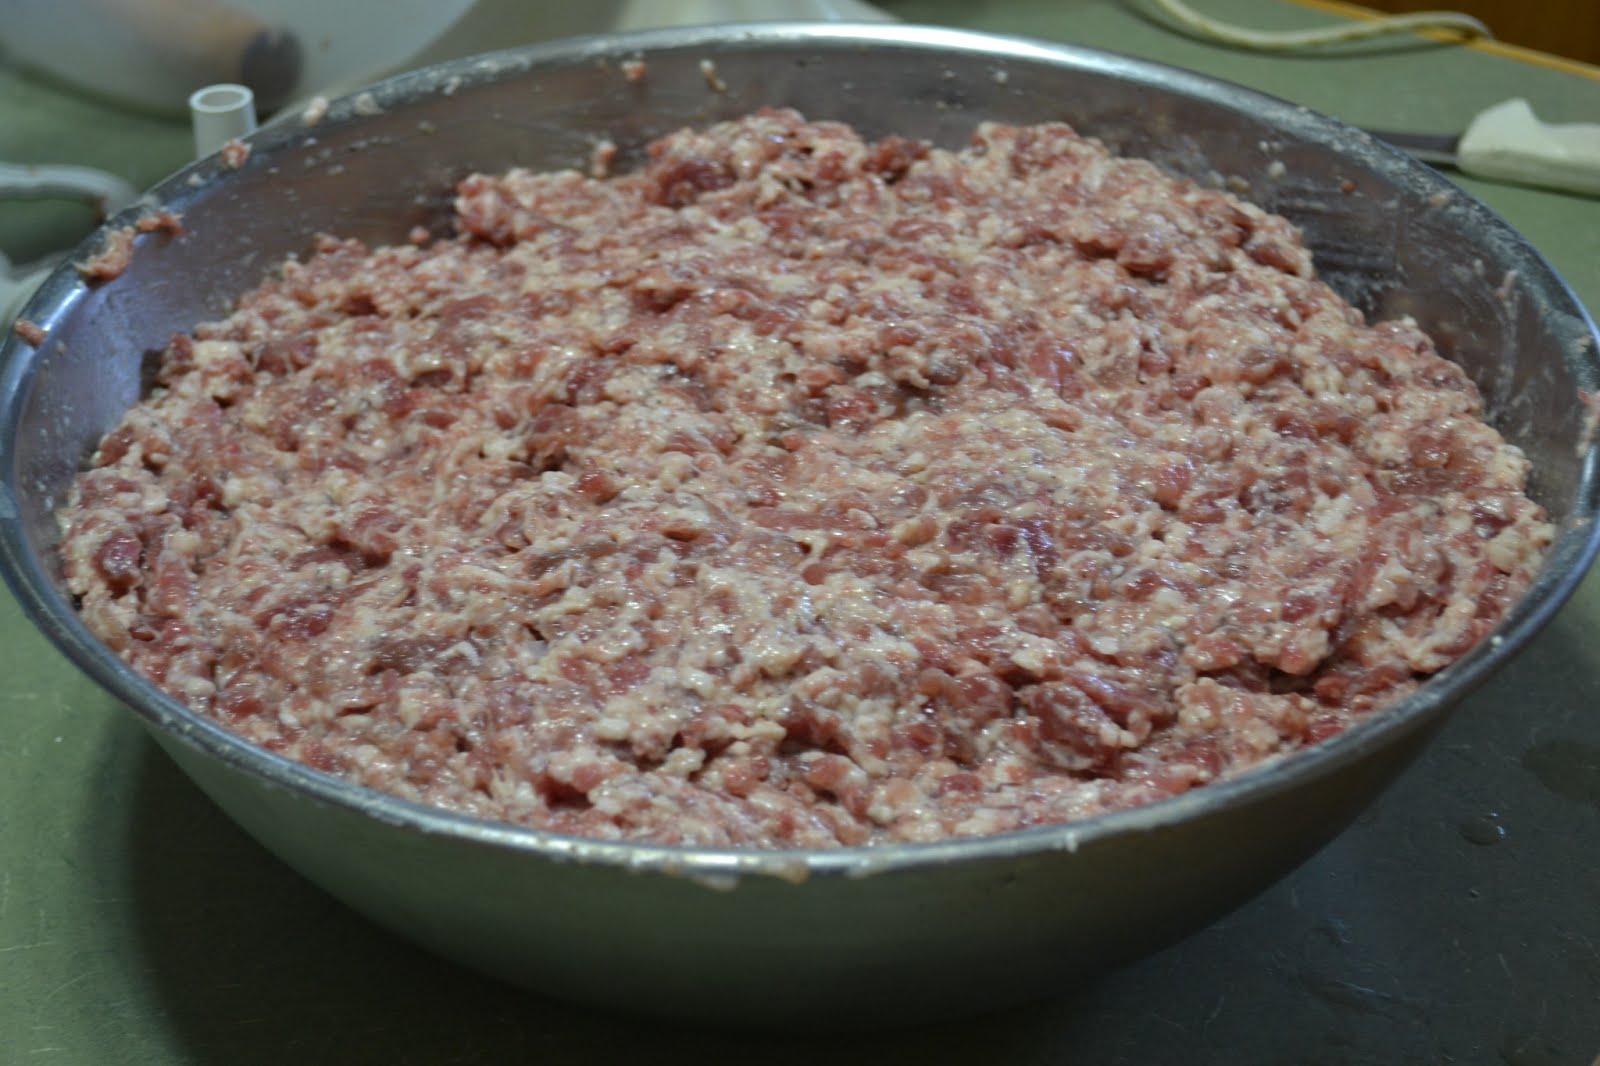
As you can see from the picture above, it may not look real appetizing but it does smell good. So let’s stuff it.
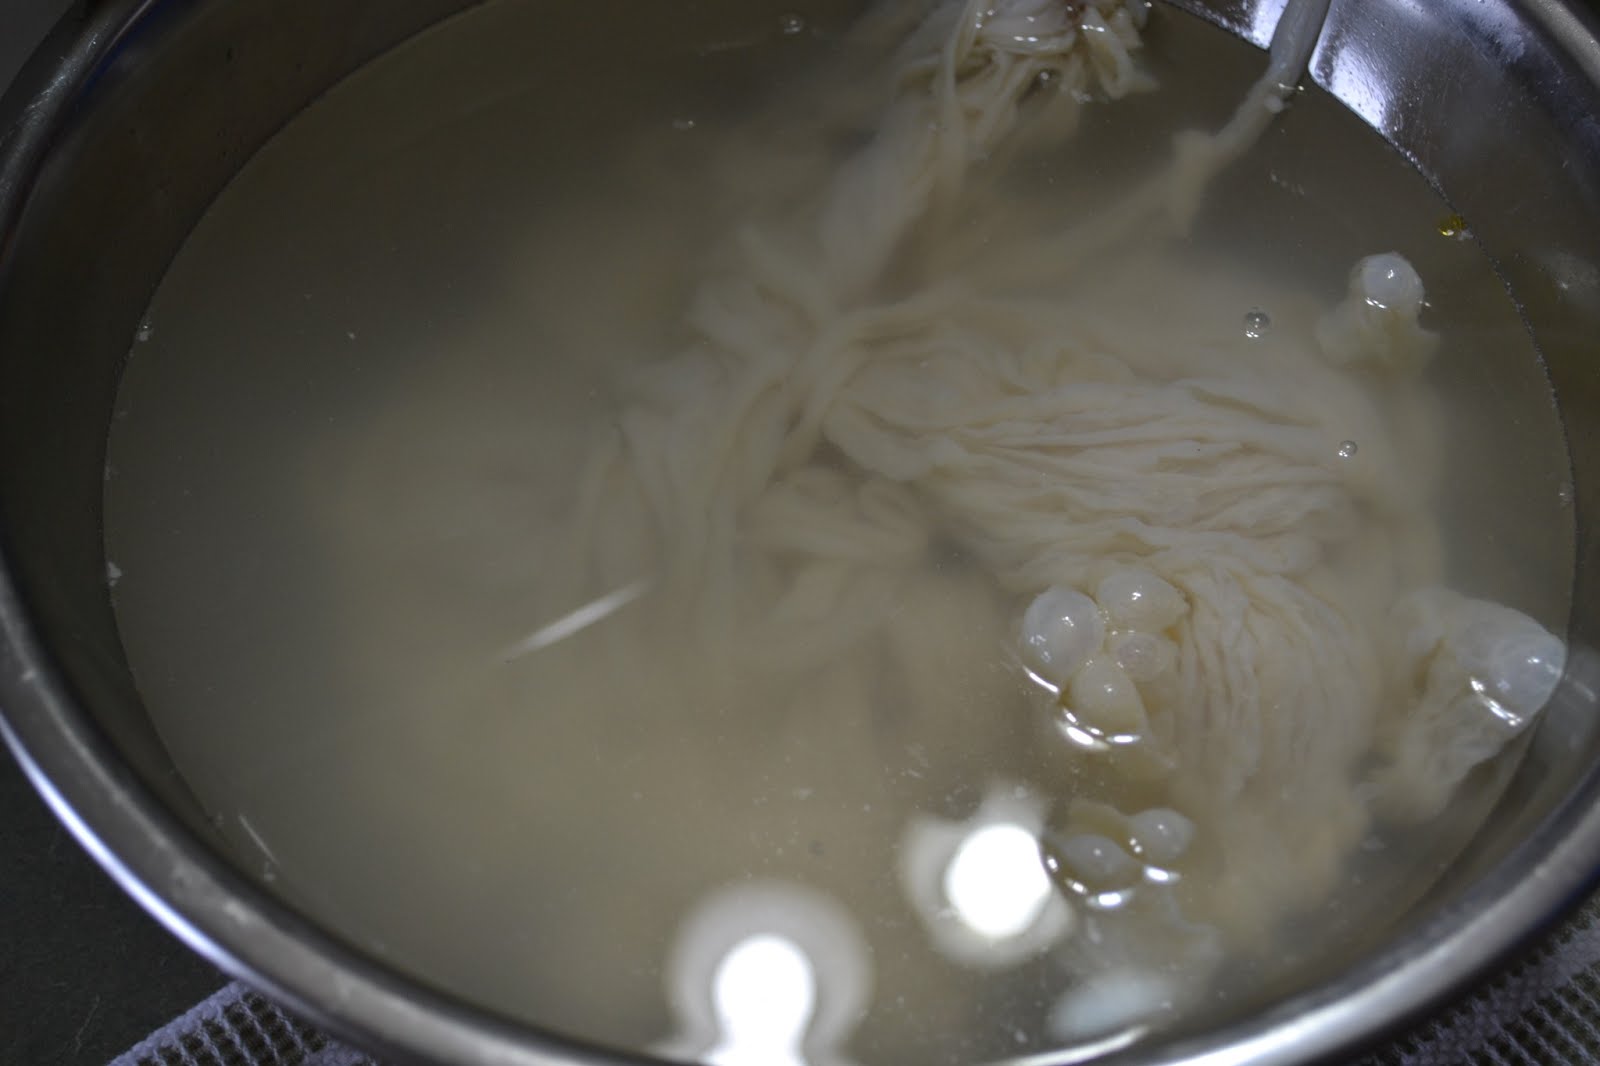
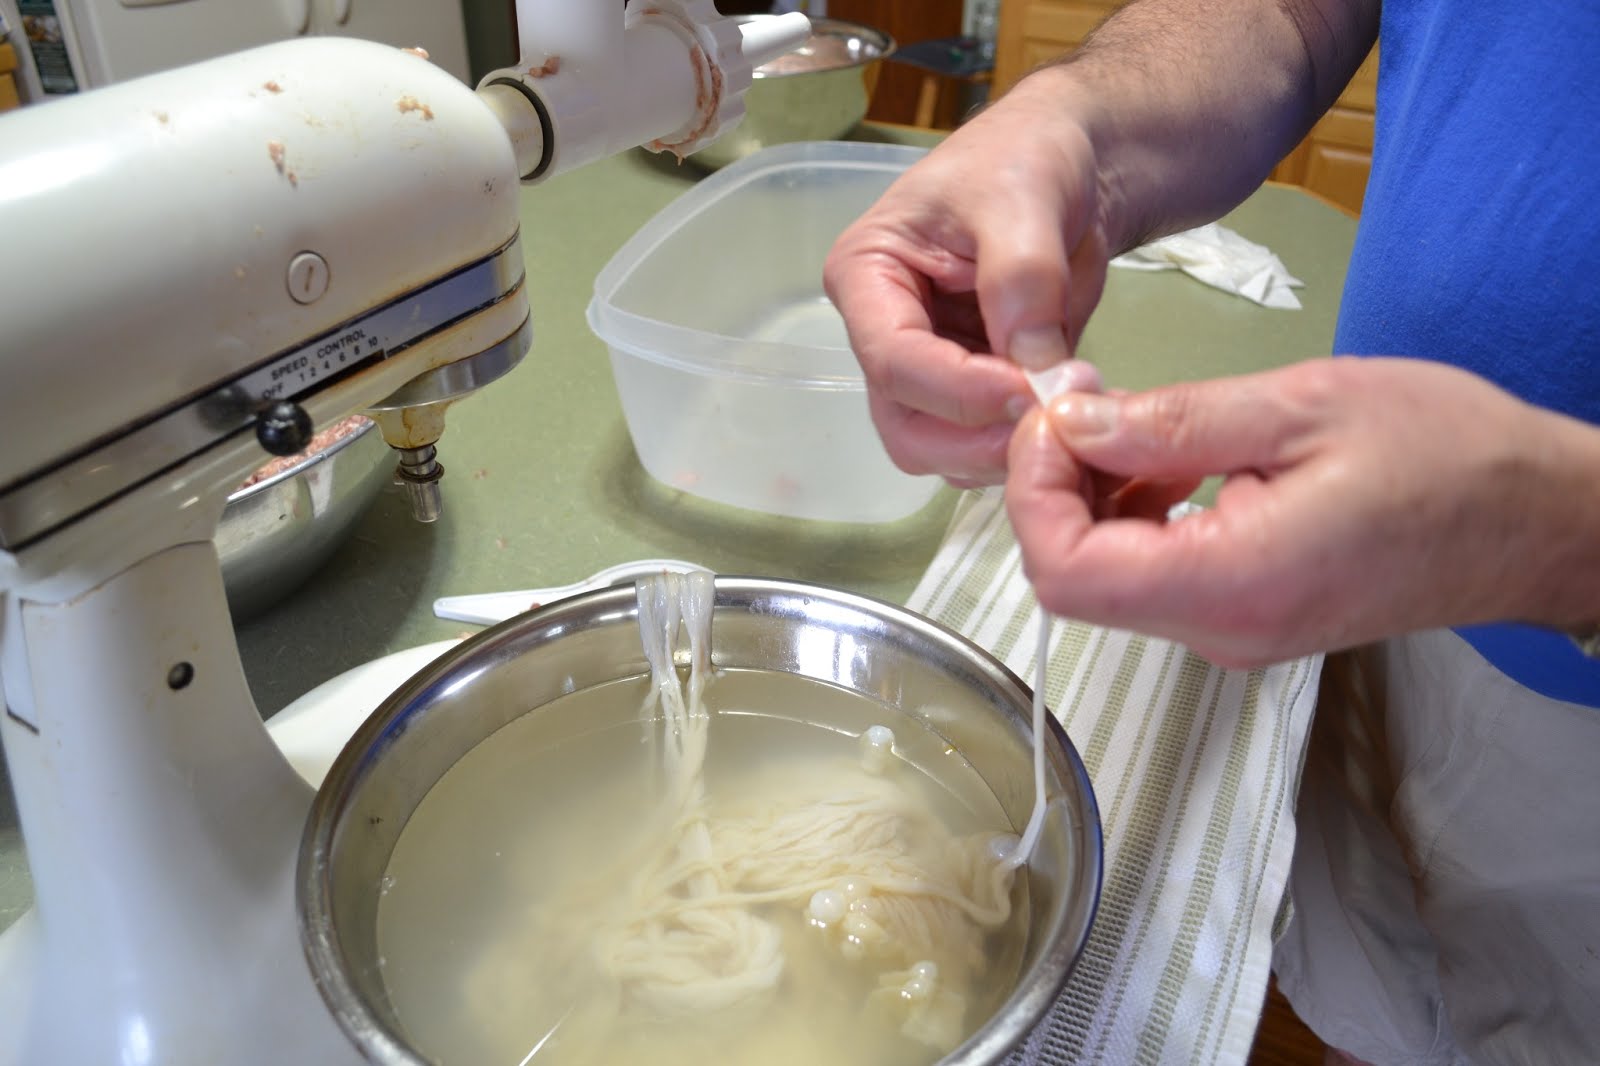
I went to a local meat packer and purchased our hank of hog casings. You can purchase these online. I used 32 - 35 mm pre-flushed hog casings. We’ll learn more about various casings at a later date. So let’s get to stuffing. We drained the salt water that they came packed in and placed them all in a container with warm water. You will need to rinse these slippery little devils off 2 - 3 times so as to remove any excess salt water. So, once I did this I untied the knot in the one end and gently pulled these out of the warm water and placed on the table. This will make help make them come apart easier as we use them. Note in this picture we are opening the one end of the casing so we can put it on the stuffing tube of our Kitchen Aid attachment.
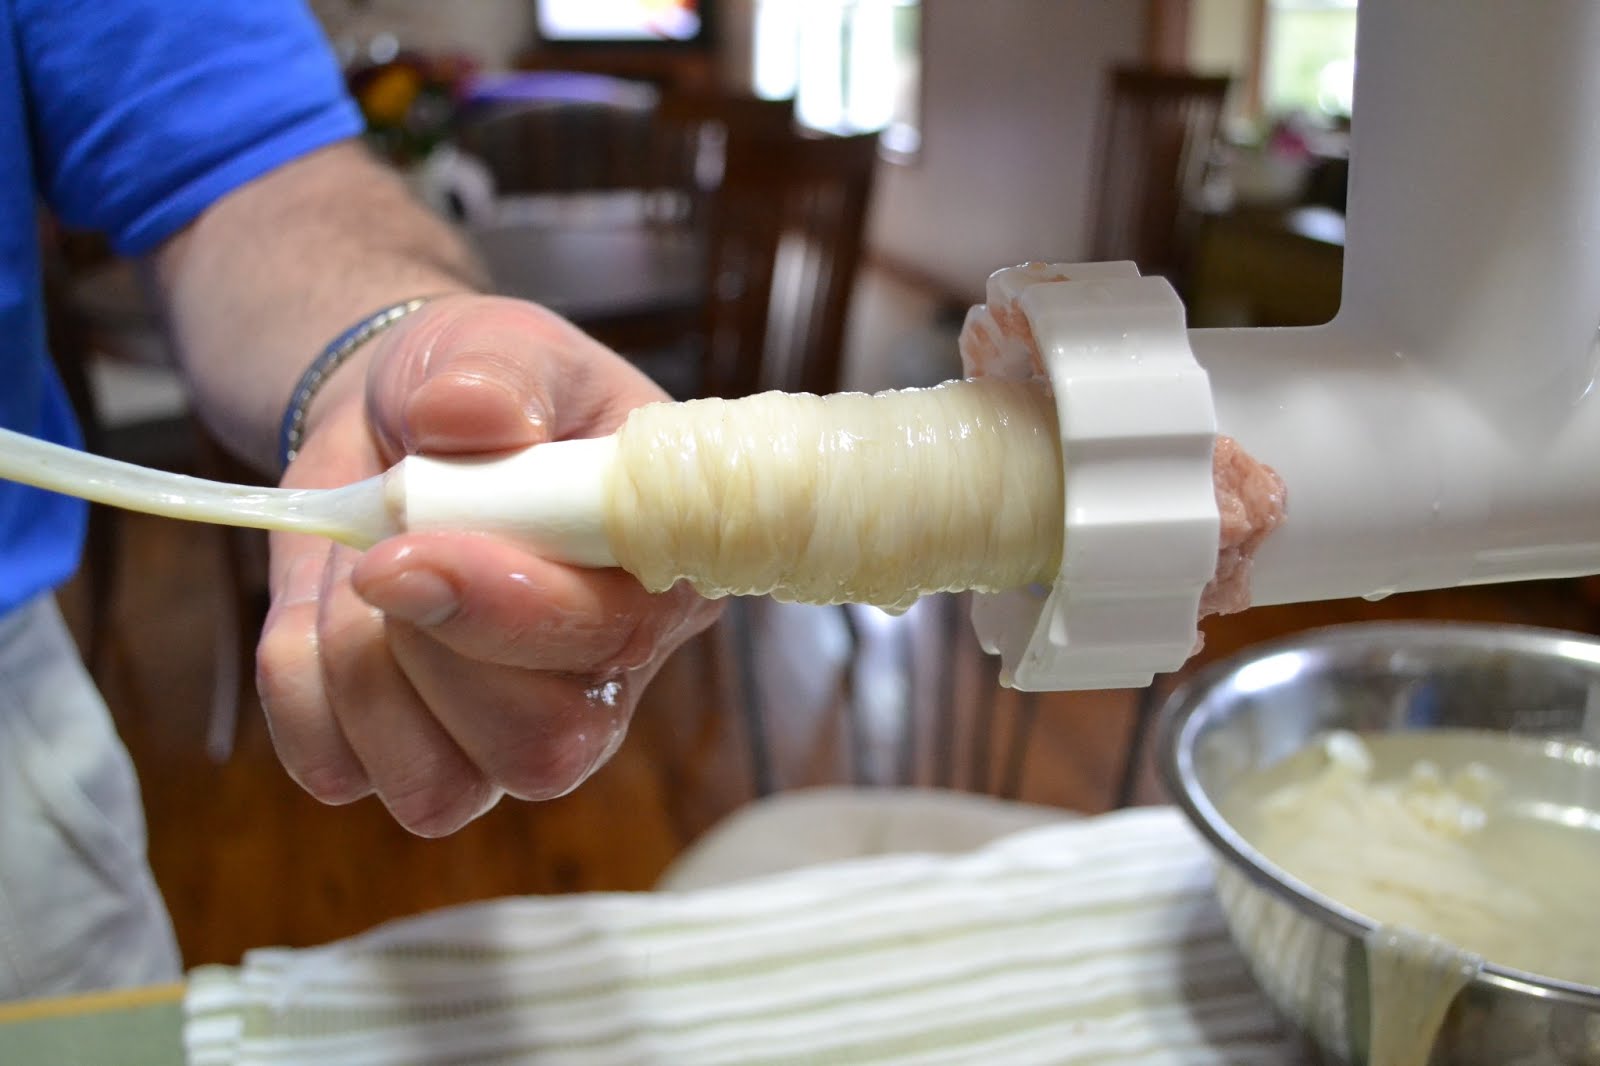
And now turn on the Kitchen Aid and get some of the kielbossi to the end of the tube. This will eliminate any air so that when we tie a knot in the end of the casing. Now lets turn the Kitchen Aid on and stuff away. We need to hold the casing snugly on the end as we feed the meat into the stuffer.
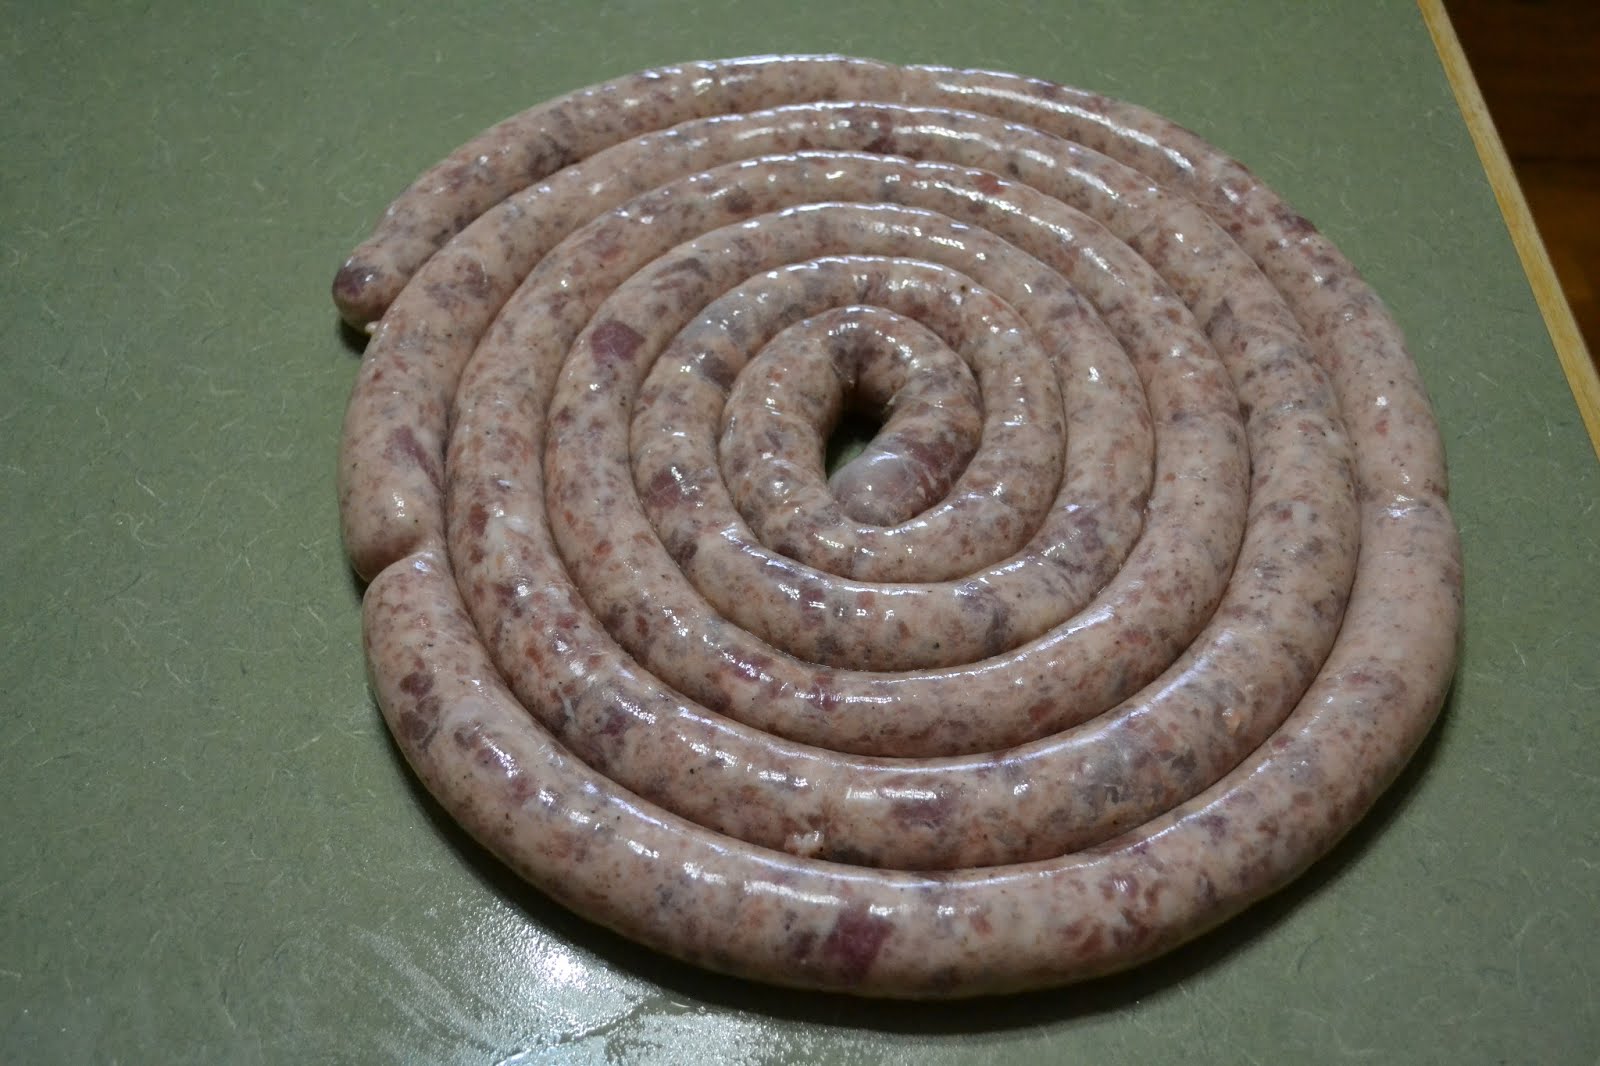
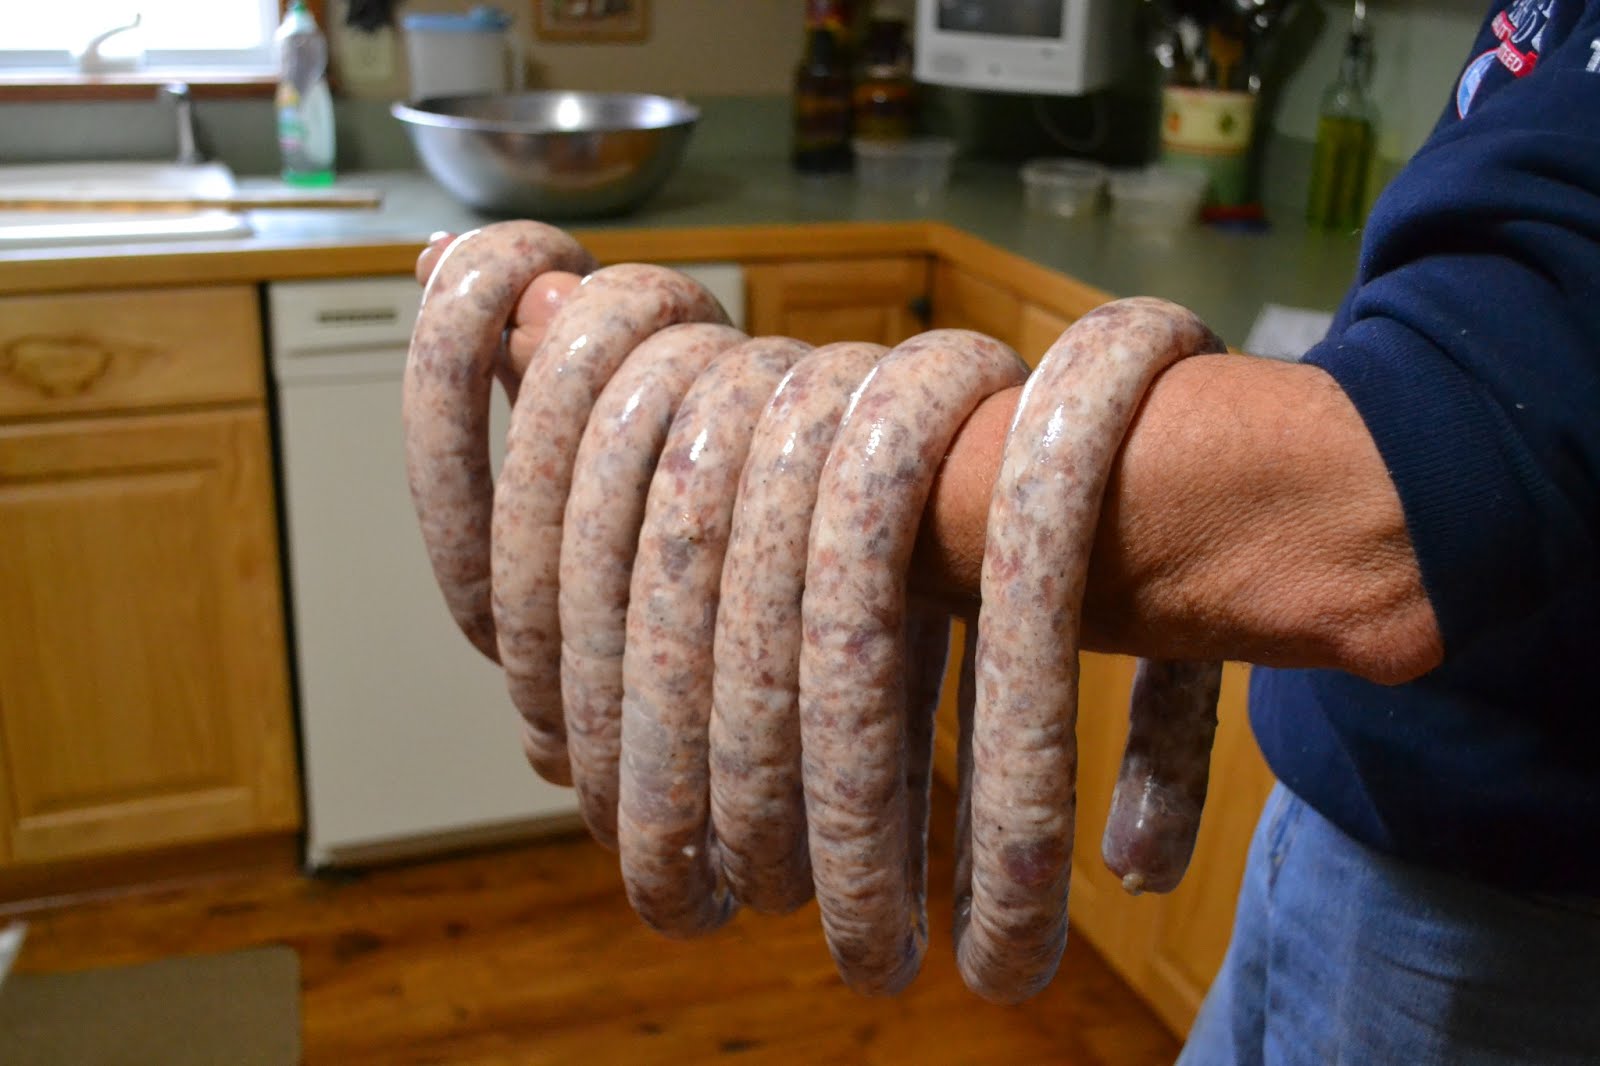
One person can accomplish this but having an assistant to feed the meat is very helpful. Continue to stuff until out of casing. Add another casing and start up again. We need to go slow at first as learning the art of stuffing will require time and practice. We want to make sure we stuff the casing tight enough but not so tight that the casing breaks. At the same time we don’t want any air in the casing. If we get an air pocket we can eliminate it with a pin or the pointed end of a sharp knife. If we miss an air pocket, no big deal as it won’t hurt it but it just makes for an unattractive product. And now we really have a challenge of hanging this long roll of kielbossi. We need to continue to gently grab the inside roll with one hand and hang it on on your other arm.
This really takes some patience and a lot of practice but you can do it. Just keep trying. And now to the smokehouse.
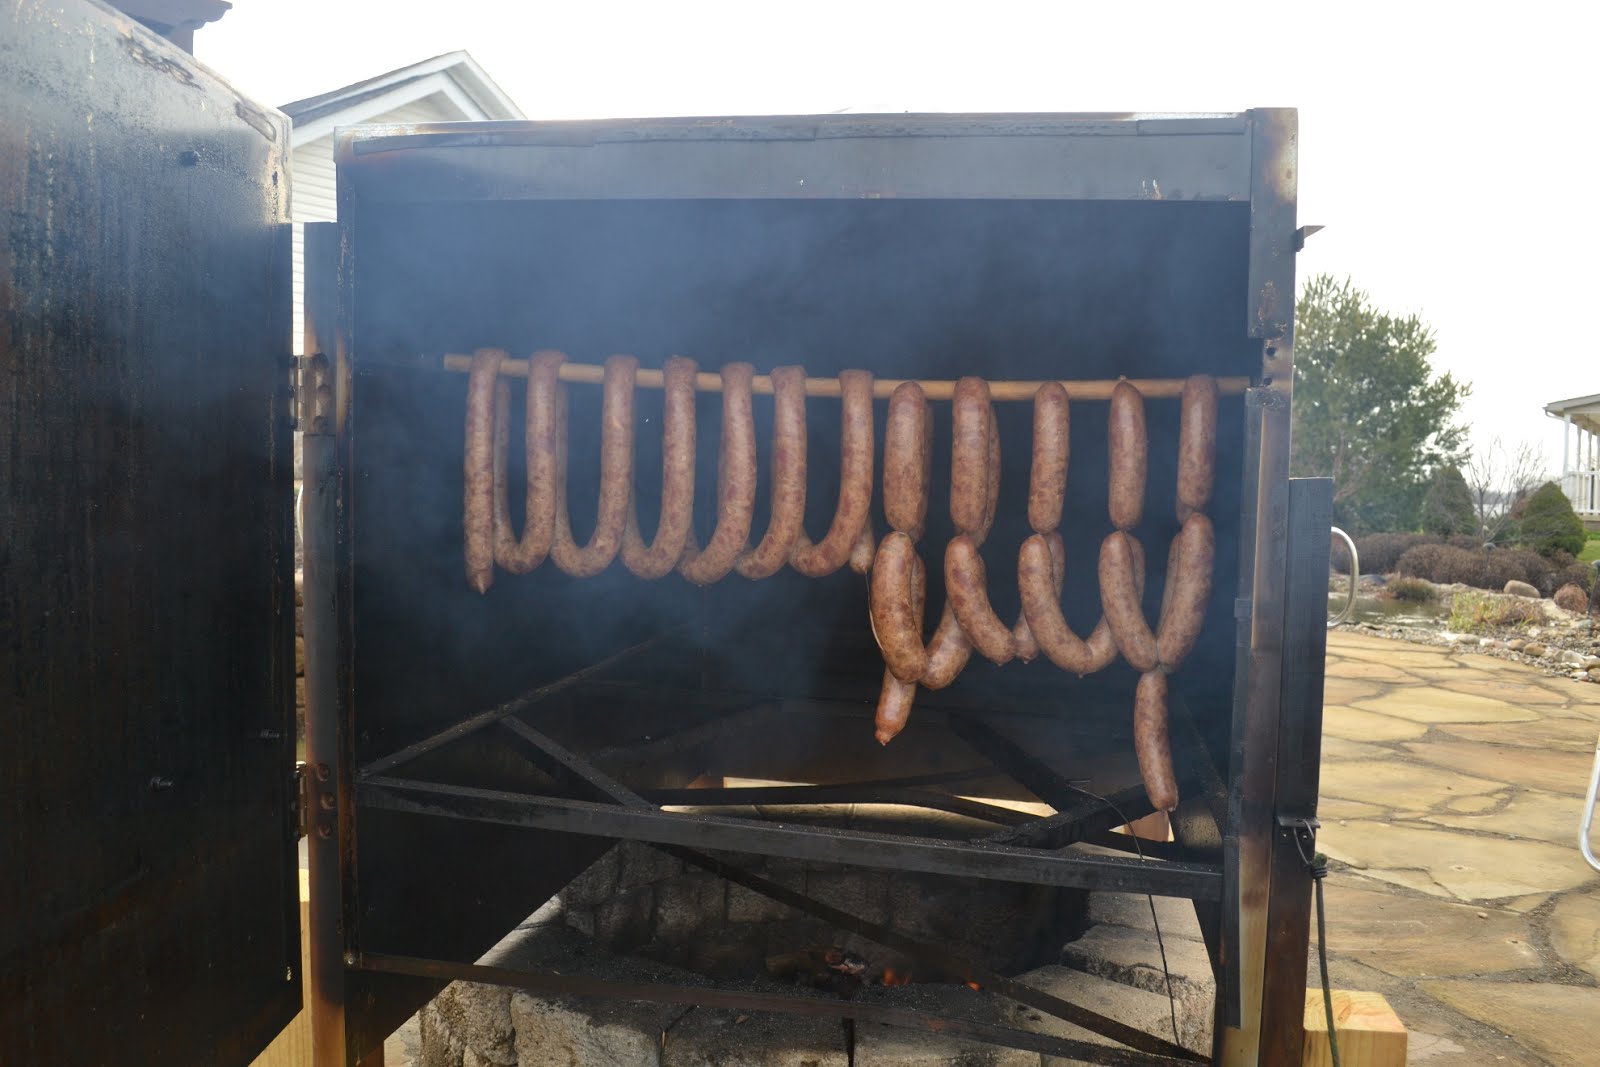
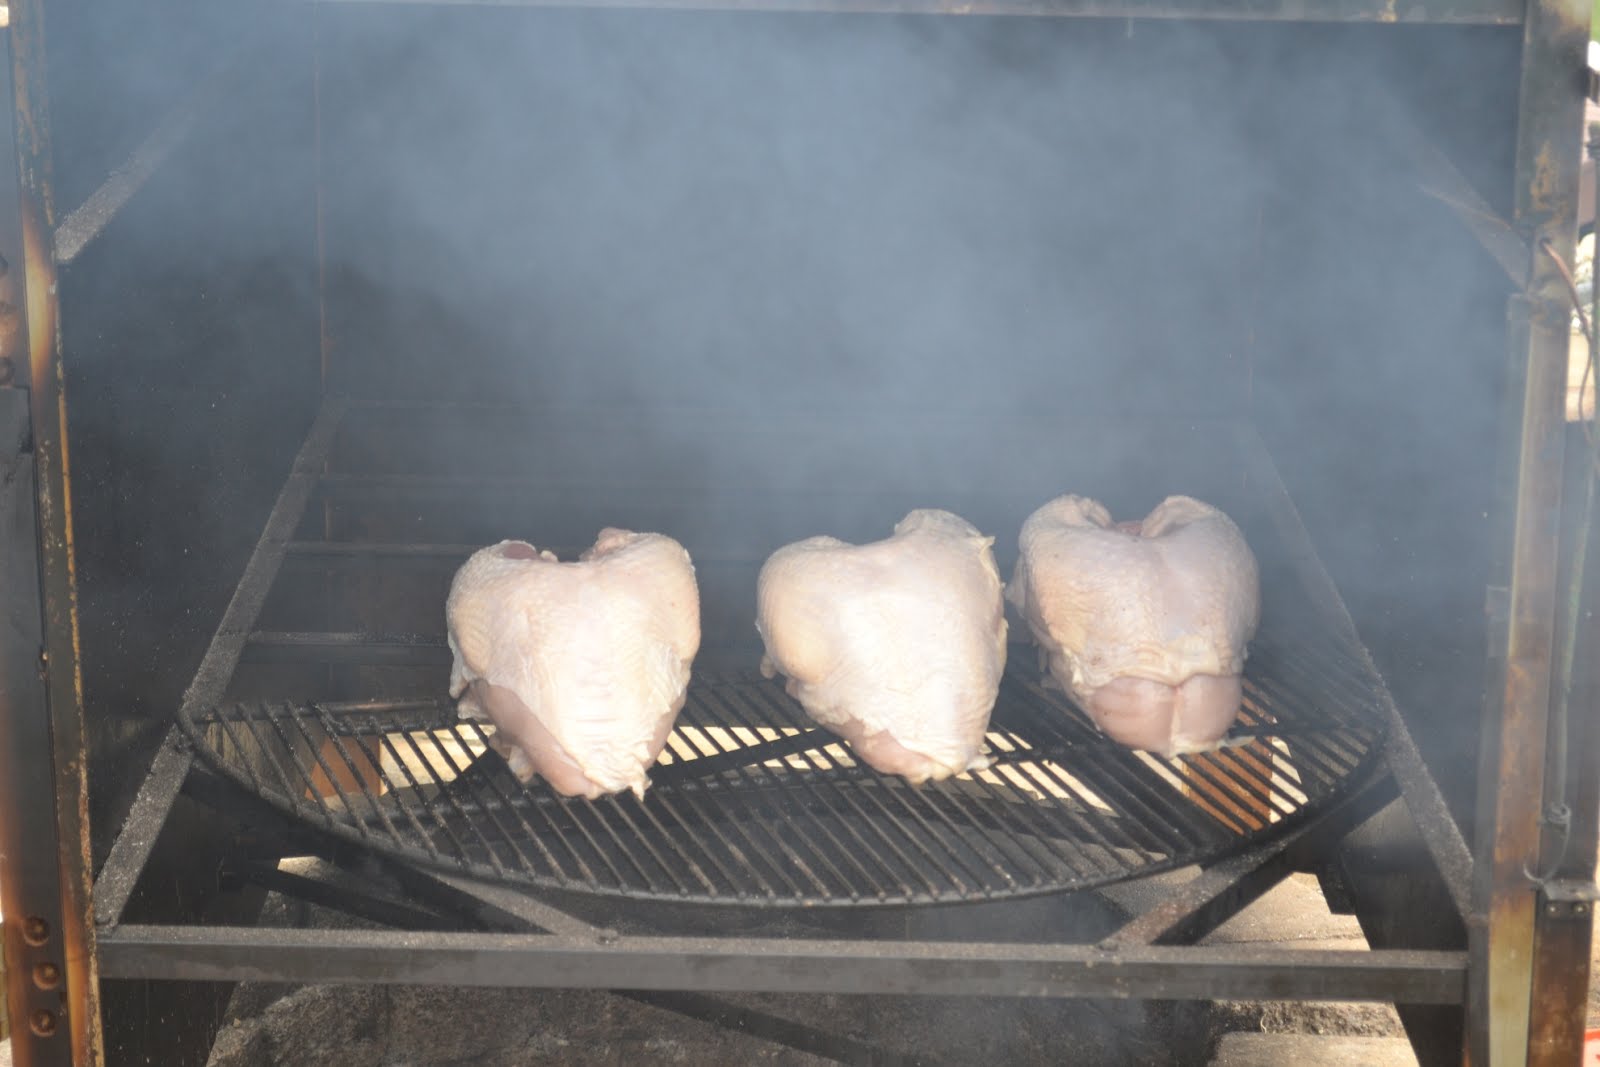
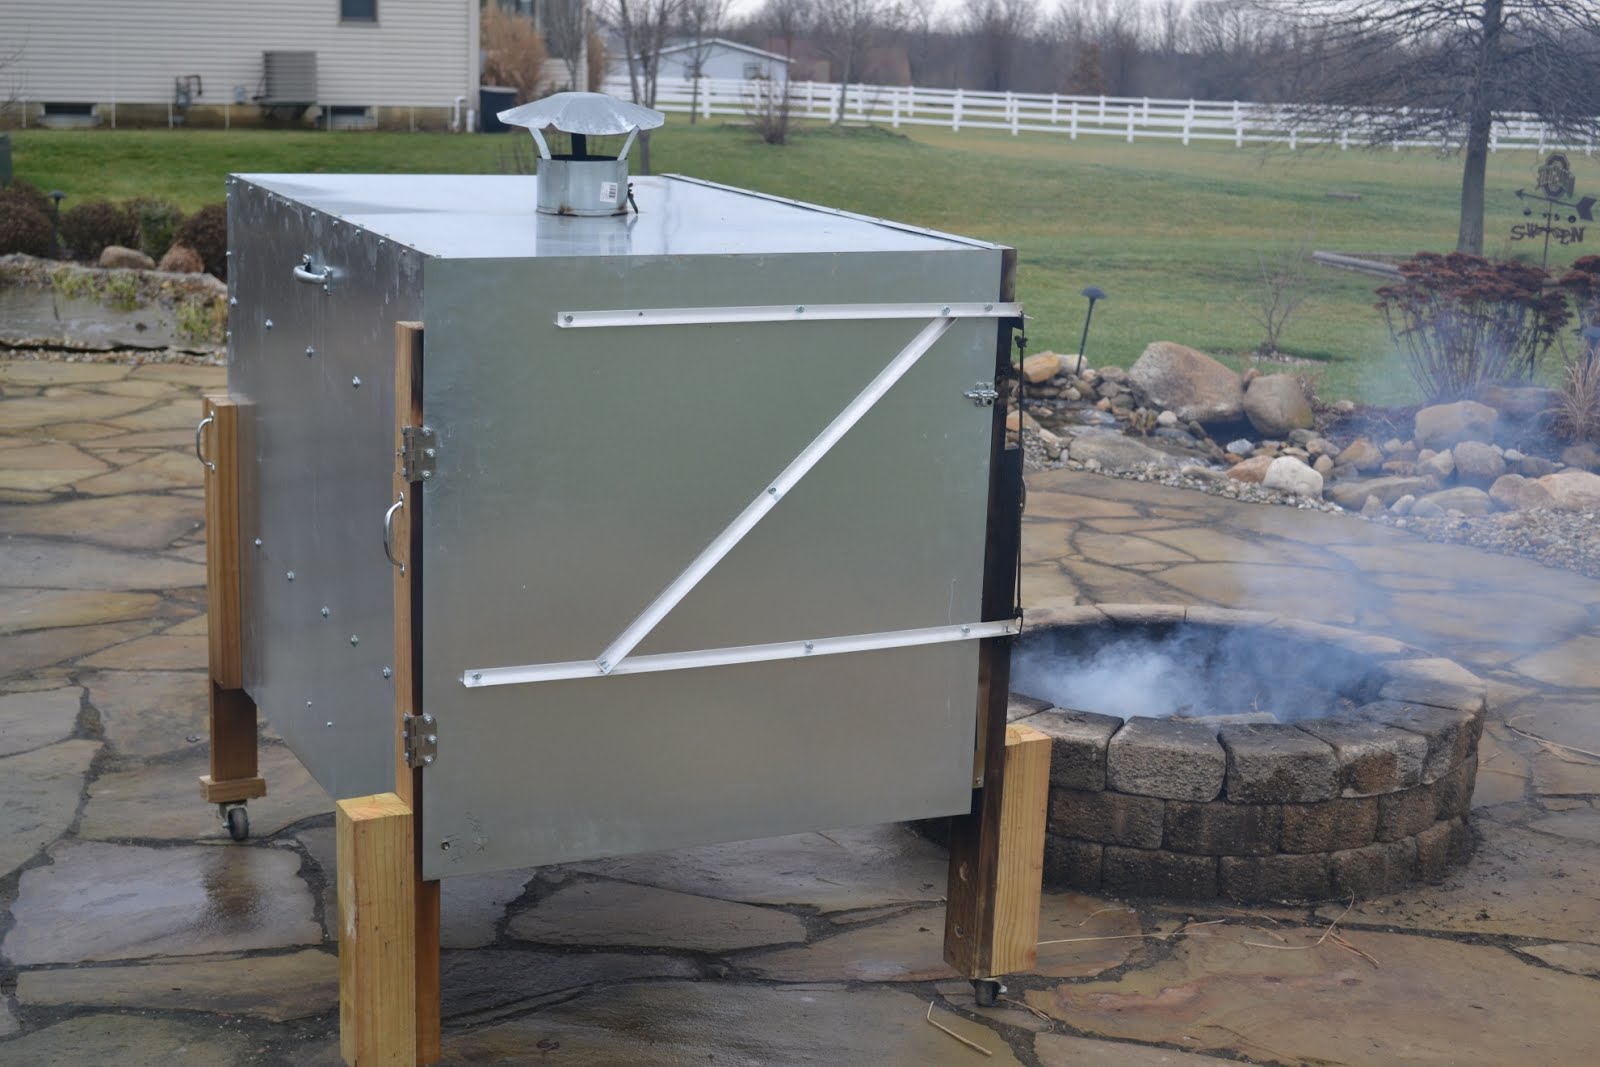
My method of smoking is slightly different then a lot of others but it works. As you can see in the picture above I roll my smokehouse over our patio firepit. It requires constant monitoring as I don’t want the smokehouse temperature to get over 190. Depending on the outside temperature and the wind it may take me 3 ½ - 4 hours. I really like using hickory wood but will also mix in a little bit of apple.
After the internal temperature reaches 150° F -- and I will check it several places to make sure -- I will remove from the smokehouse with a glove, and place in a large container (tub) of cold water. A little tip is to constantly add cold water to your container. I put the hose in the water and turn it on slowly. You want the internal temperature of the sausage to get to at least 110° F before removing from water as this will assure that the product will not shrivel.
Now remove from the water and place on your kitchen counter or someplace where the product can “rest” for about a half hour or so. This will help the color to "set" and help the meat hang onto the juice. Now wrap in loose paper and place in refrigerator until it chills completely, at least an hour.
Only thing left to do is enjoy your hard work.